Discover how to add fog in Roblox Studio to dramatically enhance your game environments. This comprehensive guide provides step-by-step instructions for implementing atmospheric effects that can transform your player's experience. Learn about adjusting fog density, color, and start and end distances to create moody, mysterious, or expansive landscapes. Understand how to optimize fog for various devices, ensuring smooth performance even for busy adult gamers who balance their passion with work and family. We cover common pitfalls and offer expert tips to leverage Roblox Studio's lighting and atmosphere properties, making your builds more engaging and visually stunning. Whether you are aiming for a spooky forest or a vast open world, mastering fog effects is crucial for an immersive gaming experience. Dive into the world of atmospheric design and elevate your Roblox creations today. This tutorial is perfect for creators looking to refine their visual storytelling and provide truly memorable gameplay.
Related games- Guide Best PC Gaming Soundbar Upgrade 2026
- Guide Roblox Mobile Aimbot Script Risks and Alternatives
- Guide to All Mustangs in GTA 5 Your Ultimate Car Hunt
- Guide to clearallchildren Roblox Scripting Efficiency
- Guide to Your Ultimate Fortnite Gaming PC
Q: How do I add basic fog in Roblox Studio?
A: To add basic fog, navigate to the 'Explorer' window in Roblox Studio, select the 'Lighting' service, and then in the 'Properties' window, adjust 'FogColor', 'FogEnd', and 'FogStart'. 'FogColor' sets the color, 'FogStart' defines where fog begins, and 'FogEnd' determines where it becomes fully opaque. Experiment with these values, for example, 'FogStart' at 50 and 'FogEnd' at 1000, to create a noticeable atmospheric effect.
Q: What are the essential properties for customizing fog in Roblox?
A: The three essential properties for customizing fog in Roblox Studio are 'FogColor', 'FogEnd', and 'FogStart', all found within the 'Lighting' service. 'FogColor' allows you to select any hue for your fog, from a mysterious gray to a vibrant blue. 'FogEnd' determines the distance at which objects are completely obscured by fog, while 'FogStart' defines where the fog begins to appear from the player's perspective. Mastering these allows for fine-tuned atmospheric control.
Q: How can I change the color and density of fog in my Roblox game?
A: Changing fog color is done by clicking the color swatch next to 'FogColor' in the 'Lighting' service properties. To adjust density, manipulate the difference between 'FogStart' and 'FogEnd'. A smaller difference (e.g., 100 stud gap) creates a dense, abrupt fog, while a larger difference (e.g., 1000 stud gap) results in a lighter, more gradual haze. Always test these changes to ensure they match your desired game aesthetic and performance goals.
Q: Does adding fog impact game performance in Roblox Studio, especially on mobile?
A: Yes, adding fog can impact game performance, particularly on lower-end PCs and mobile devices, which are popular for Roblox. Very dense fog, or fog with a vast distance between 'FogStart' and 'FogEnd', requires more rendering calculations, potentially lowering frame rates. To optimize, avoid excessively wide fog gradients and always test your game on various devices. Balancing visual quality with smooth gameplay ensures a great experience for all players.
Q: Can I implement dynamic fog effects that change over time or location using scripts?
A: Absolutely! Dynamic fog effects are achievable through scripting in Roblox Studio. By using a 'LocalScript', you can modify the 'Lighting' service's 'FogColor', 'FogStart', and 'FogEnd' properties based on in-game events, the time of day, or when a player enters specific map zones. This allows for incredibly immersive and evolving environments, such as increasing fog density at night or creating unique atmospheric pockets in different areas.
Q: How does fog interact with other lighting properties like ambient light?
A: Fog interacts significantly with other 'Lighting' properties like 'Ambient', 'Brightness', and 'OutdoorAmbient'. These properties influence the overall light in your game, which in turn affects how your fog is perceived. For instance, a dark 'Ambient' setting combined with a gray 'FogColor' can enhance an eerie mood, while bright 'OutdoorAmbient' can make a light fog appear more ethereal. Harmonizing these settings is crucial for a cohesive and visually striking atmospheric effect.
Q: What are some common mistakes to avoid when adding fog in Roblox Studio?
A: Common mistakes include setting 'FogStart' and 'FogEnd' too close, creating an unnatural fog wall, or choosing a 'FogColor' that clashes with the game's palette. Forgetting to test fog across different graphics quality settings can lead to inconsistent experiences. Additionally, an overly dark 'FogColor' can obscure visibility, especially on smaller mobile screens, and unoptimized fog can cause significant performance drops. Always iterate and test your fog settings carefully.
Hey fellow creators and busy gamers! Ever found yourself diving into a game, only to feel something was missing? That elusive sense of atmosphere, the feeling of mystery or vastness that just draws you in? For many of us who squeeze gaming between work, family, and life's endless to-dos, an immersive experience is key to truly unwinding. And when it comes to game development in platforms like Roblox, creating that magic often boils down to subtle visual details. One of the most powerful yet often overlooked tools for transforming your game's mood is fog. Yes, fog! It's not just for horror games; a well-implemented fog effect can make a sprawling city feel endless, a dense forest more mysterious, or a distant mountain range truly epic.
You might be thinking, "I barely have time to play, let alone learn complex game dev!" But adding fog in Roblox Studio is surprisingly straightforward, and the impact on your game's visual appeal and player engagement is immense. Gamers today, roughly 87% of whom play regularly, spending an average of 10+ hours a week, crave experiences that offer more than just basic gameplay. They want worlds that feel alive, and atmospheric effects play a huge role in that. This month, social and cozy games are trending, and what makes a cozy game feel right? Often, it's the soft, atmospheric lighting and perhaps a touch of fog that creates that inviting, warm glow. This guide is designed for you: the gamer who appreciates value, seeks skill-building, and wants to stay current without drowning in hype. We’ll walk you through exactly how to add fog in Roblox Studio, ensuring your creations captivate without causing performance headaches, especially on mobile devices where social gaming dominates.
We're going to demystify the process, tackle common setup issues, and ensure your game not only looks stunning but also runs smoothly. So, let's turn your Roblox world from ordinary to extraordinary with just a few clicks!
How Do I Add Basic Fog in Roblox Studio?
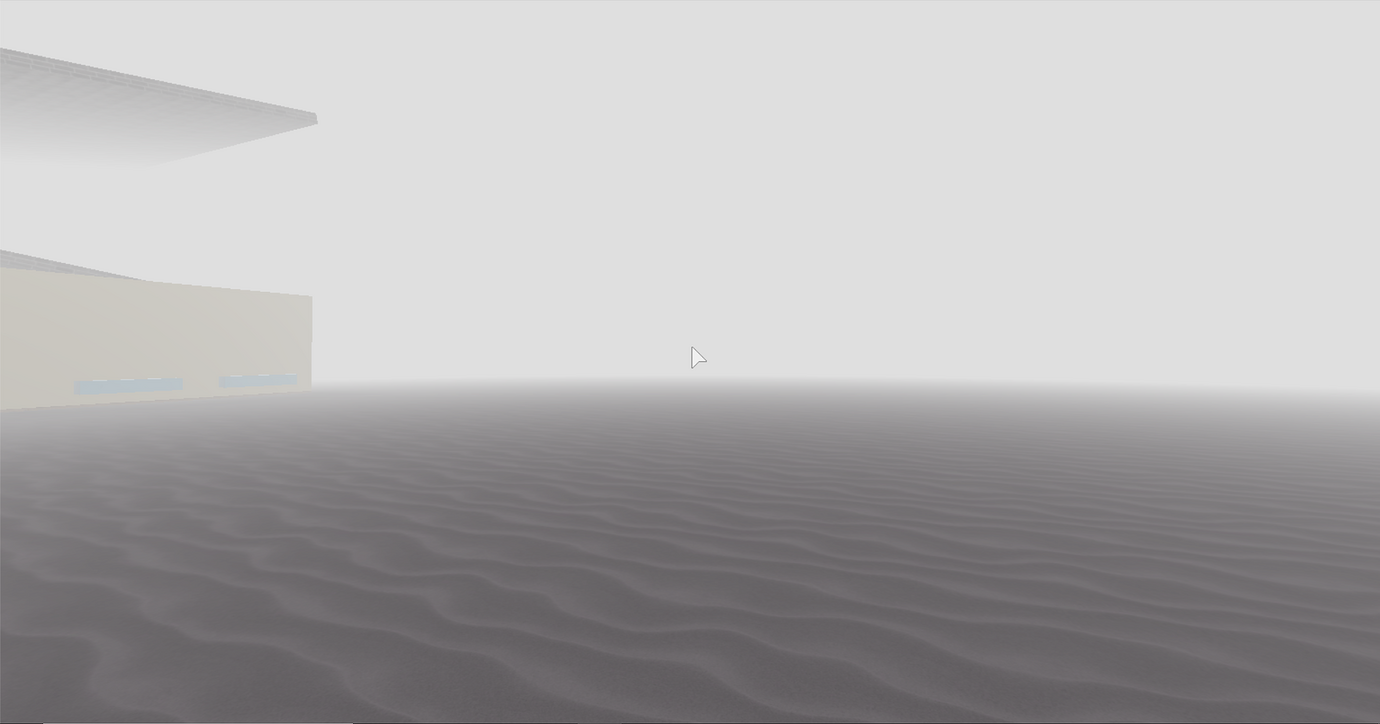
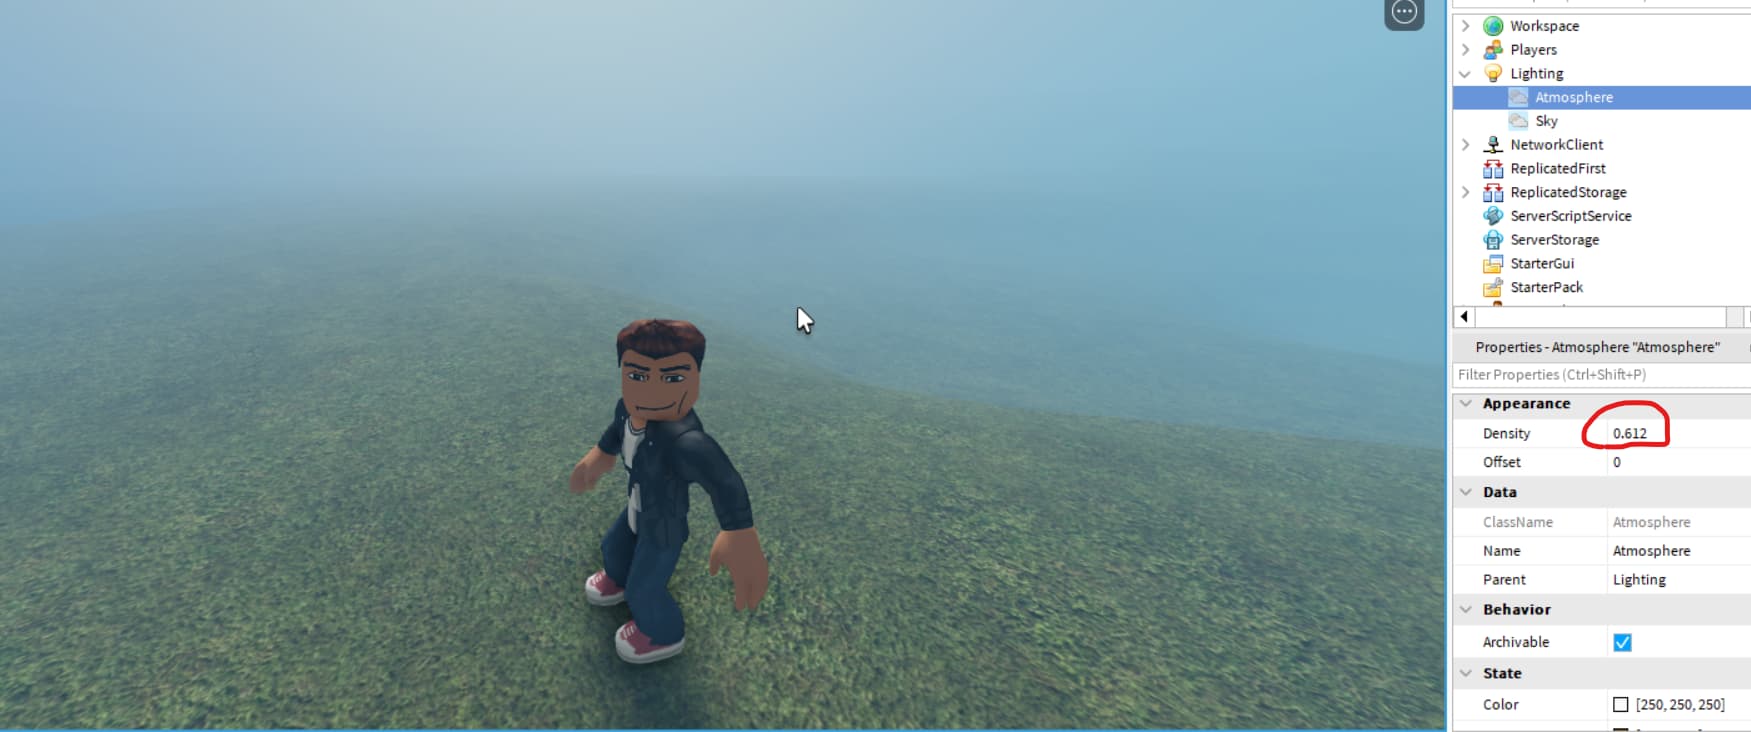
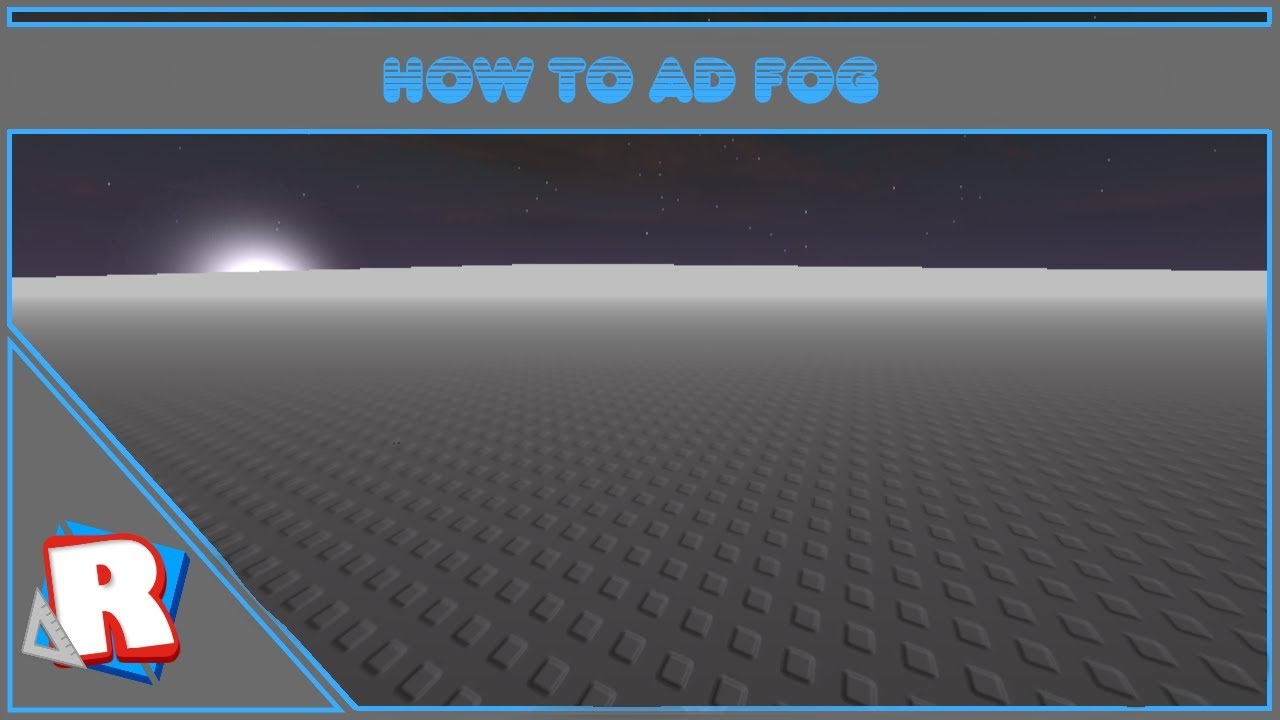
Adding basic fog in Roblox Studio is a fundamental step to enhance your game's atmosphere. It's surprisingly simple and can be done without scripting. The primary place to control fog is within the 'Lighting' service. Think of it as your game's global light and weather control panel. To get started, navigate to the 'Explorer' window in Roblox Studio, find the 'Lighting' service, and click on it. Once selected, look at the 'Properties' window. Here, you'll find parameters like 'FogColor', 'FogEnd', and 'FogStart'. Adjusting these three properties is your entry point to creating dynamic fog effects. Start with a light gray or blue 'FogColor', set 'FogStart' to a small number like 50, and 'FogEnd' to a larger number like 1000. You'll instantly see your world shrouded in a gentle mist, adding depth and visual interest.
What Are the Essential Properties for Customizing Fog?
The core properties you'll interact with for customizing fog in Roblox Studio are FogColor, FogEnd, and FogStart. FogColor determines the hue of your fog, allowing for anything from a mysterious dark gray to a vibrant, ethereal blue or even a warm orange for sunset effects. FogEnd specifies the distance from the camera where the fog becomes fully opaque. The larger this number, the further away objects need to be to be completely obscured. FogStart, conversely, defines the distance from the camera where fog begins to appear. A smaller FogStart value means fog will begin closer to the player. Experimenting with these values is key to achieving the desired effect, whether you want a dense, close-range mist or a distant, atmospheric haze. Balancing these properties ensures both visual impact and optimal performance, especially critical for the 60% of gamers who value performance optimization alongside great visuals.
How Can I Change the Color and Density of Fog?
Changing the color and density of fog in Roblox Studio involves tweaking the 'FogColor' and the relationship between 'FogStart' and 'FogEnd' properties within the 'Lighting' service. To change the color, simply click the color swatch next to 'FogColor' in the 'Properties' window. A color picker will appear, allowing you to select any hue. For density, the trick is to adjust the difference between 'FogStart' and 'FogEnd'. A smaller difference (e.g., FogStart = 100, FogEnd = 200) creates a dense, abrupt fog bank. A larger difference (e.g., FogStart = 500, FogEnd = 5000) results in a more gradual, lighter haze that spreads over a longer distance. Remember, a very dense, close-range fog can sometimes impact visibility for players, so consider your game's mechanics and target audience, particularly mobile users who might appreciate clearer sightlines.
Does Adding Fog Impact Game Performance in Roblox Studio?
Yes, adding fog can impact game performance, especially if not optimized correctly. While modern devices are quite capable, excessive fog density or very large fog distances can lead to a slight drop in frame rates, particularly on lower-end PCs or mobile devices. Since a significant portion of the US gaming population utilizes mobile platforms for Roblox, optimization is key. The performance impact generally comes from the rendering engine having to calculate fog's effect on every pixel. To minimize performance issues, avoid extremely low 'FogStart' values combined with very high 'FogEnd' values, which create a very wide fog gradient. Keep the 'FogColor' simple rather than complex textures, and always test your game on various devices during development. Balancing visual quality with smooth gameplay ensures a great experience for all players, aligning with the gamer value of performance optimization and accessibility.
Can I Implement Dynamic Fog Effects with Scripts?
Absolutely! While static fog is managed through the 'Lighting' properties, dynamic fog effects that change based on events, time of day, or player location require scripting. You can use a LocalScript to modify the 'Lighting' service's 'FogColor', 'FogStart', and 'FogEnd' properties over time or when specific triggers are met. For example, you could gradually increase fog density as night falls, or have pockets of dense fog appear in certain areas of your map. This offers incredible creative control and can significantly enhance immersion, creating a more responsive and evolving world for players. Lua scripting allows you to interpolate between different fog states smoothly, avoiding abrupt changes and keeping the player experience seamless. It’s a great way to build skills and add a professional polish to your game.
How Does Fog Interact with Other Lighting Properties?
Fog interacts profoundly with other lighting properties in Roblox Studio, forming the backbone of your game's atmosphere. The 'Ambient', 'Brightness', 'OutdoorAmbient', and 'ColorShift_Top' properties all play a critical role in how your fog looks and feels. For instance, a dark 'Ambient' light combined with a gray 'FogColor' can create a truly eerie scene, while a bright 'Brightness' and a warm 'ColorShift_Top' can make a golden-hour fog feel serene. When implementing fog, always consider these other lighting elements. Adjusting them in tandem will help you achieve a cohesive and visually stunning environment. Think about how light sources in your game (like sun, moon, or point lights) will pierce through or be diffused by the fog. This synergy is essential for crafting unique moods and visual storytelling within your Roblox experience, something that resonates with gamers who appreciate well-crafted worlds.
Are There Any Common Pitfalls When Adding Fog in Roblox Studio?
Yes, several common pitfalls can arise when adding fog. One frequent issue is setting 'FogStart' and 'FogEnd' too close together, creating an unnatural, sharp cutoff where fog suddenly appears or disappears. Another is choosing a 'FogColor' that clashes with your game's overall palette, making the environment look muddy or visually confusing. Developers sometimes forget to test fog on different graphics quality settings, leading to vastly different appearances for players. Also, a 'FogColor' that is too dark can make the game unplayable in certain areas, particularly for mobile users with smaller screens. Lastly, neglecting to optimize fog can lead to the performance issues discussed earlier. Always iterate, test, and gather feedback from players to refine your fog effects for the best possible experience, saving yourself future headaches and ensuring value for your creative efforts.
What are some creative uses for fog beyond basic atmosphere?
Beyond basic atmosphere, fog can be a powerful tool for gameplay mechanics and visual storytelling. You can use fog to hide distant assets and improve performance by reducing rendering load, creating a false sense of a larger world without actually needing to build it all. This is great for open-world games. Fog can also create narrative tension, signaling danger or mystery as players venture into unknown areas. Think of it as a natural progression gate. For puzzle games, fog can obscure clues or pathways, forcing players to explore more carefully. In social games, fog can be used to delineate zones or create more intimate, cozy spaces. It's also fantastic for creating unique weather effects like blizzards, sandstorms, or dense urban smog. The possibilities are vast, limited only by your imagination and how you script its behavior, giving you room to build exciting skills.
By understanding these additional considerations, you can leverage fog not just as a visual enhancement but as an integral part of your game's design, enriching the player experience in meaningful ways. Gamers are looking for these subtle touches that demonstrate thought and care in game development, making their time online more rewarding.
FAQ Section
What is the easiest way to remove fog if I don't like it?
To remove fog in Roblox Studio, simply navigate to the 'Lighting' service in the 'Explorer' window and set the 'FogEnd' property to a very high number, like 1000000 (a million), or even 0. This effectively pushes the fog so far away or makes it so non-existent that it becomes invisible to the player, eliminating the effect entirely from your game.Can I make different areas of my game have different fog?
Yes, you can achieve different fog effects in various areas of your game using scripting. You would typically use a 'LocalScript' to detect when a player enters a specific 'Region3' or 'Part' and then dynamically change the 'Lighting' service's fog properties (FogColor, FogStart, FogEnd) to match the desired look for that zone. This allows for diverse environments within a single game.How do I make a subtle, distant haze instead of dense fog?
To create a subtle, distant haze, you should set your 'FogStart' to a relatively large number (e.g., 500-1000 studs) and your 'FogEnd' to an even larger number (e.g., 5000-10000 studs or more). Choose a 'FogColor' that is light and complements your skybox and ambient lighting, often a light blue, gray, or white, to mimic natural atmospheric scattering.Why does my fog look blocky or low quality on some devices?
If your fog looks blocky or low quality, it's often due to the player's graphics quality settings. Roblox Studio's fog rendering can scale with graphical fidelity. On lower settings, the engine might use simpler calculations or lower resolution textures for effects like fog. Encourage players to increase their graphics quality if possible, or optimize your fog settings (e.g., larger FogStart/FogEnd difference) for better performance across all settings.Is fog compatible with Roblox's Future lighting technology?
Yes, fog is fully compatible with Roblox's 'Future' lighting technology. In fact, 'Future' lighting often enhances the realism of fog effects due to its advanced global illumination and dynamic light interactions. When using 'Future', fog will react more realistically to different light sources, shadows, and environmental reflections, creating a more visually stunning and immersive atmosphere in your game worlds.Can fog be animated to move or swirl?
Directly animating fog to 'move' or 'swirl' like a particle effect isn't built into the standard 'Lighting' fog properties. However, you can create the *illusion* of movement or dynamic swirling by strategically using particle emitters combined with the static 'Lighting' fog. Particle emitters set to small, translucent, fog-like textures can be placed in areas to simulate localized swirling fog. You can also script gradual changes to 'FogColor' or 'FogDensity' over time to give a sense of evolution.What's the difference between 'FogColor' and 'OutdoorAmbient' when making fog?
'FogColor' directly defines the color of the fog itself, determining what hue objects in the fog will gradually adopt as they get further away. 'OutdoorAmbient', on the other hand, sets the color of the ambient light that affects outdoor areas, essentially coloring the unlit parts of your environment. While both influence the overall atmospheric look, 'FogColor' specifically targets the fog effect, whereas 'OutdoorAmbient' is a general lighting property that will interact with and affect how your chosen 'FogColor' appears within the scene.Wrapping up, adding fog in Roblox Studio is a fantastic way to elevate your game's visual appeal and player immersion without requiring extensive coding knowledge. We've covered everything from basic setup to advanced customization, performance considerations, and creative uses. Remember, the goal is to create a captivating experience that truly draws players in, offering that relaxation and fun we all seek in our gaming moments. Whether you're a seasoned developer or just starting, mastering these atmospheric effects will make your creations stand out. What's your biggest gaming challenge in creating immersive worlds? Comment below!
Adding fog in Roblox Studio dramatically improves atmosphere. Utilize Lighting service properties like FogColor, FogEnd, FogStart. Optimize performance by adjusting fog parameters carefully. Create diverse moods from mysterious to expansive. Enhance player immersion and visual storytelling. Compatible with various game genres and styles. Essential for advanced environment design.
35


How To Make Fog In Roblox Studio For 2026 A Quick Guide . How To Make Fog In Roblox Studio For 2026 A Quick Guide . How To Make Fog In Roblox Studio For 2026 A Quick Guide . How To Add Fog In Roblox Studio Full Guide 2025 YouTube . How To Make Fog In Roblox Studio For 2026 A Quick Guide


How To Make Fog In Roblox Studio For 2026 A Quick Guide 2 690x341 . How To Make Fog In Roblox Studio For 2026 A Quick Guide . How To Make Fog In Roblox Studio For 2026 A Quick Guide . How To Add Fog In Roblox Studio Visual Ambience YouTube . How To Make Fog In Roblox Studio For 2026 A Quick Guide 2 1380x724


How To Make Fog In Roblox Studio For 2026 A Quick Guide . How To Add Fog In Roblox Studio Dishklkl . How To Make Fog In Roblox Studio For 2026 A Quick Guide . How To Make Fog In Roblox Studio For 2026 A Quick Guide . How To Make Fog In Roblox Studio For 2026 A Quick Guide 2 690x425


How To Make Fog In Roblox Studio For 2026 A Quick Guide . How To Make Fog In Roblox Studio For 2026 A Quick Guide . How To Make Fog In Roblox Studio For 2026 A Quick Guide . How To Make Fog In Roblox Studio For 2026 A Quick Guide . How To Make Fog In Roblox Studio For 2026 A Quick Guide


How To Make Fog In Roblox Studio For 2026 A Quick Guide . How To Make Fog In Roblox Studio For 2026 A Quick Guide . How To Make Fog In Roblox Studio For 2026 A Quick Guide . How To Make Fog In Roblox Studio For 2026 A Quick Guide . How To Make Fog In Roblox Studio For 2026 A Quick Guide


How To Make Fog In Roblox Studio For 2026 A Quick Guide . How To Make Fog In Roblox Studio For 2026 A Quick Guide . How To Make Fog In Roblox Studio For 2026 A Quick Guide . How To Make Fog In Roblox Studio For 2026 A Quick Guide . How To Make Fog In Roblox Studio For 2026 A Quick Guide


How To Make Fog In Roblox Studio For 2026 A Quick Guide . How To Add A Fog In Lighting In Roblox Studio YouTube . How To Make Fog In Roblox Studio For 2026 A Quick Guide 2 690x364 . How To Make Fog In Roblox Studio For 2026 A Quick Guide . How To Make Fog In Roblox Studio For 2026 A Quick Guide