Navigating the Roblox creator ecosystem successfully in 2026 demands meticulous attention to detail, especially when it comes to custom clothing. This comprehensive guide will equip aspiring and seasoned Roblox apparel designers with the essential knowledge and actionable strategies required to thoroughly test their creations before final upload. Discover the critical tools and techniques for effective pre-upload evaluation, ensuring your designs meet Roblox's strict moderation standards and appeal to a vast user base. Learn how to leverage Roblox Studio's robust 3D preview features, conduct collaborative in-game testing with fellow creators, and identify common pitfalls like transparency issues or texture misalignments. By mastering these testing methodologies, creators can significantly reduce failed uploads, save valuable Robux, and consistently deliver high-quality, trend-setting virtual fashion that captivates the Roblox community. This guide will help you refine your process, enhance your brand reputation, and ensure your creative vision translates perfectly into the dynamic world of Roblox.
Why is testing Roblox clothing crucial before uploading?
Testing Roblox clothing before uploading is crucial to prevent moderation rejections, save Robux, and ensure your designs appear correctly on diverse avatar types. It guarantees quality, adheres to Roblox guidelines, and enhances your creator reputation, leading to better sales and user satisfaction by delivering flawless virtual fashion.
How do I 3D preview clothing in Roblox Studio?
In Roblox Studio, insert an R6 or R15 dummy. Apply your texture ID to a Shirt/Pants object or directly to the dummy. Use the 'Avatar Editor' plugin to change body types and scales. Rotate the avatar to inspect all angles, checking for texture stretching, alignment, and transparency issues before final upload.
Can I test Roblox clothing in-game?
Yes, in-game testing is essential. Upload your clothing to a private game, either as a T-shirt for free initial checks or a test shirt/pants. Invite friends to try it on, move, and emote with various avatar bodies. This simulates real-world usage, revealing dynamic clipping or visual glitches missed in static previews.
What common errors should I check for during testing?
During testing, check for transparency issues (unwanted white boxes), clipping through avatar parts, texture bleeding, blurry resolution, and misalignment on seams. Also, confirm adherence to Roblox's moderation guidelines to avoid content rejections. For layered clothing, ensure natural interaction between layers and avatar movement.
How do I ensure proper fit on Roblox avatars?
To ensure proper fit, use Roblox Studio's Avatar Editor plugin to test your clothing on a variety of R6 and R15 body types and scales. During in-game tests, have friends wear your item with different body packages and animations. Pay attention to joints like elbows and shoulders for any clipping or unnatural deformation.
Does effective clothing testing save Robux?
Yes, effective clothing testing saves Robux significantly. Each failed upload for shirts or pants still incurs a 10 Robux fee. By catching errors and making corrections during the testing phase in Roblox Studio and private games, you avoid repeatedly paying for rejected uploads, maximizing your investment and accelerating successful publishing.
What are Roblox's clothing moderation rules?
Roblox's clothing moderation rules prohibit explicit content, copyrighted material, hate speech, discriminatory symbols, personal information, and anything that violates their Community Standards. Designs must be appropriate for all ages. Thorough testing should also include a content review to ensure compliance and prevent rejections.
How to Test Roblox Clothing Before Uploading Guide
Welcome, fellow Roblox creators and virtual fashion pioneers, to the definitive guide for mastering clothing design verification in 2026. In an era where Roblox's creator economy continues its meteoric ascent, offering unparalleled opportunities for self-expression and monetization, the stakes for delivering high-quality, compliant clothing assets have never been higher. With millions of users actively customizing their avatars and seeking unique apparel, your creations stand at the forefront of their digital identity. However, the path from concept to published masterpiece is fraught with potential pitfalls, from subtle texture misalignments to outright moderation rejections, each costing precious Robux and valuable time. Imagine pouring hours into a meticulously crafted design only for it to be denied due to an oversight that could have been caught with proper testing. This guide is designed to transform that frustration into triumph, equipping you with the expert strategies and insights needed to rigorously test your Roblox clothing before uploading. We will delve into leveraging Roblox Studio's advanced features, simulating real-world wear, gathering invaluable feedback, and understanding the evolving moderation landscape of 2026. By the end of this article, you will possess a robust toolkit to ensure every piece of clothing you upload is polished, perfect, and poised for success.
The landscape of Roblox creation in 2026 is dynamic, with continuous updates to avatar body types, layered clothing technology, and enhanced customization options. This evolution demands an equally adaptable and thorough testing methodology from creators. Gone are the days when a simple 2D preview sufficed. Modern Roblox users expect perfection across a multitude of devices and avatar configurations. Our comprehensive FAQ-style article will address all your burning questions, from the foundational 'Why bother testing?' to advanced techniques for stress-testing complex layered garments. We will cover everything from initial template checks and transparent overlay verification to engaging community members for diverse feedback. Prepare to elevate your Roblox clothing creation workflow, minimize upload failures, and maximize your creative impact, ensuring your designs shine brightly in the ever-expanding metaverse.
Understanding the Importance of Pre-Upload Testing
Why is testing Roblox clothing crucial before uploading?
Testing Roblox clothing before uploading is paramount to avoid moderation rejections, save Robux, and ensure your designs appear as intended on various avatar types. A failed upload due to a simple error means wasted Robux and time. Thorough testing guarantees quality, adheres to Roblox guidelines, and enhances your reputation as a reliable creator, leading to better sales and user satisfaction. In 2026, with Roblox's expanding features like layered clothing, meticulous testing is more vital than ever.
What are the primary benefits of thoroughly testing my Roblox clothing designs?
Beyond avoiding moderation rejections, thorough testing ensures your clothing looks professional and fits correctly on diverse avatars, which is crucial for market appeal. It helps you catch transparency issues, texture bleeding, and clipping before they become public. This proactive approach saves you Robux by preventing repeated uploads and boosts your credibility within the Roblox community, fostering trust and repeat customers. Furthermore, it allows for design refinement based on feedback, leading to higher quality assets.
Essential Tools and Initial Setup for Testing
What tools are essential for testing Roblox clothing effectively?
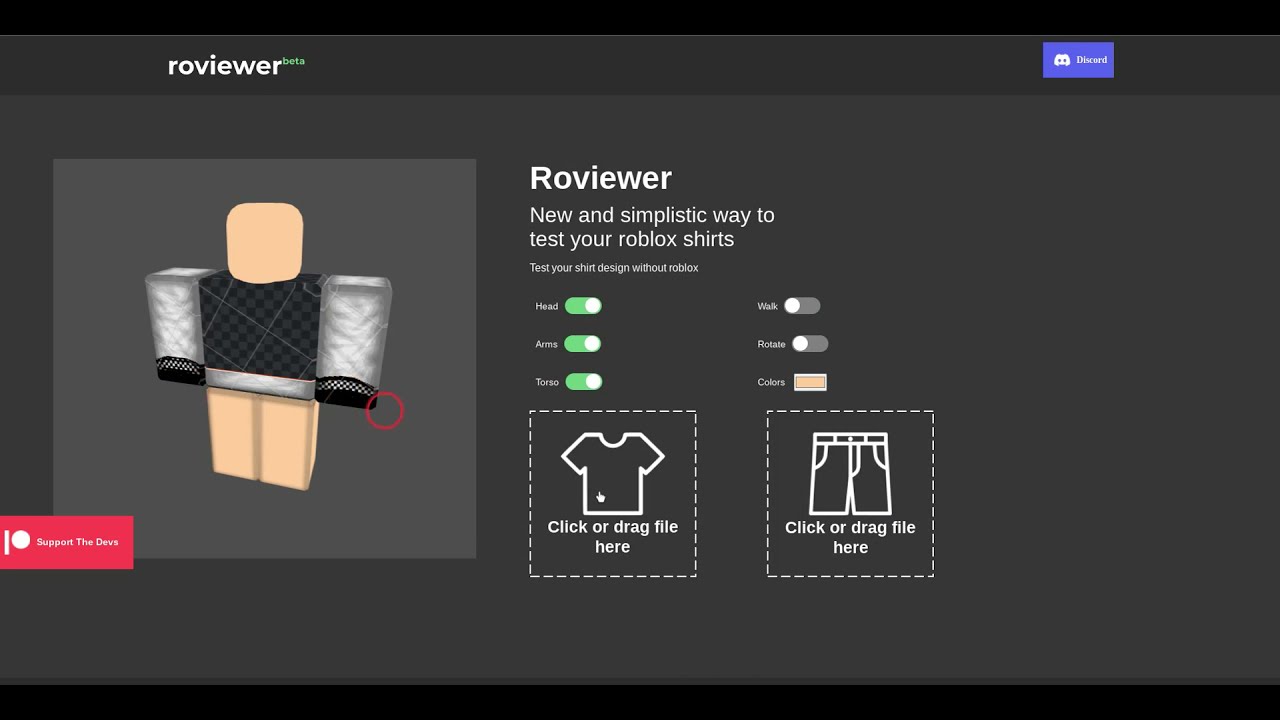
The cornerstone of effective Roblox clothing testing is Roblox Studio. Within Studio, you'll utilize the 3D preview window, the Avatar Editor plugin, and potentially custom test places. External tools like image editing software (e.g., Photoshop, GIMP, Krita) are indispensable for preparing your templates accurately, ensuring correct transparency and resolution. A reliable internet connection and a second device (mobile/tablet) for cross-platform checks are also highly beneficial for comprehensive testing in 2026.
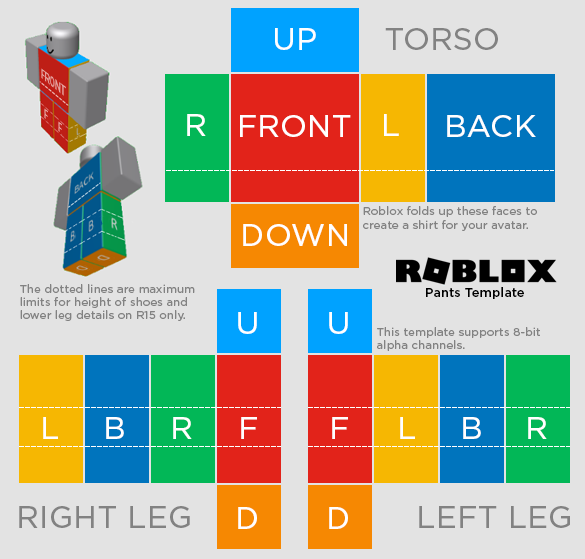
How should I prepare my clothing templates for optimal testing?
Preparation is key. Ensure your clothing templates are precisely aligned to Roblox's specifications. Use official Roblox templates as a base. Double-check that all transparent areas are genuinely transparent (alpha channel = 0) to prevent unwanted white boxes or artifacts. Maintain a high resolution for your textures to ensure crisp details, but always keep file size in mind for optimal performance within Roblox. Name your layers logically in your image editor for easy adjustments, and save in a compatible format, typically PNG, which supports transparency effectively.
Leveraging Roblox Studio for Comprehensive Previews
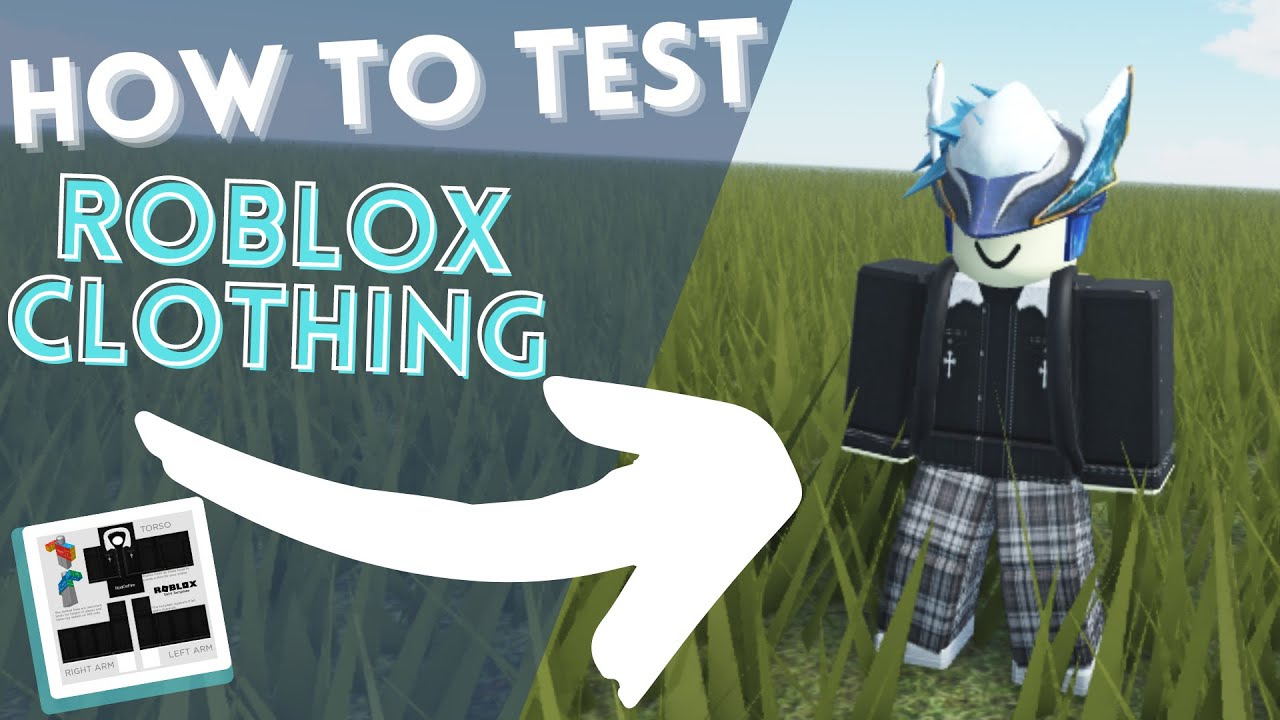
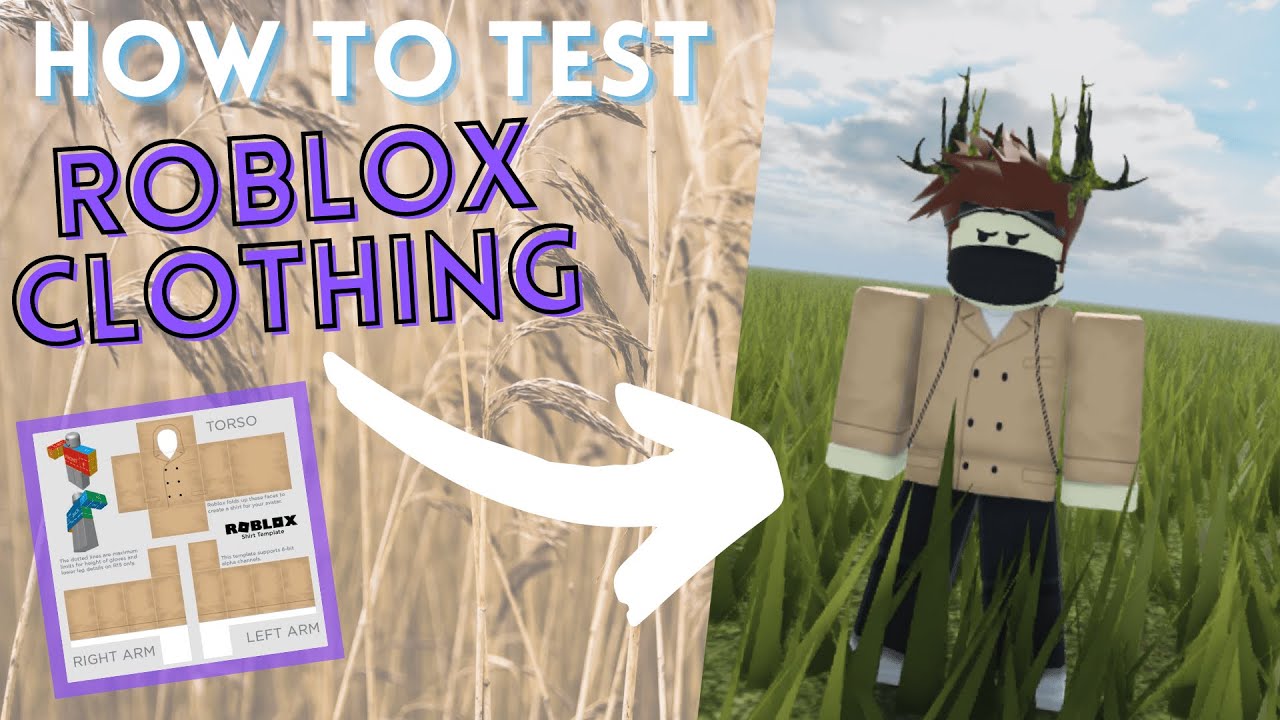
How do I use Roblox Studio's 3D preview for clothing?
Roblox Studio's 3D preview is your first line of defense. After importing your clothing template as a decal, apply it to a test avatar within Studio. You can do this by inserting an 'R6' or 'R15' dummy model. Then, either apply the texture directly or create a Shirt/Pants object and assign your texture ID. Use the 'Avatar Editor' plugin to rapidly switch between various body types, genders, and accessories. Rotate the avatar extensively, zoom in on details, and observe how the texture warps or stretches across different limbs. Pay close attention to seams, underarms, and necklines for any unintended gaps or overlaps. This tool is invaluable for catching immediate visual errors without incurring Robux costs.
Can the Avatar Editor plugin help with testing different avatar types?
Absolutely. The Avatar Editor plugin is a powerful feature within Roblox Studio specifically designed for testing avatar items, including clothing. It allows you to quickly load different R6 and R15 body parts, scales, and even pre-made character models. This enables you to see how your clothing adapts to various proportions, ensuring it doesn't clip awkwardly or distort on larger, smaller, or uniquely shaped avatars. It's essential for achieving universal appeal and reducing user complaints related to fit issues. Always test your designs across a spectrum of common Roblox body types to ensure maximum compatibility in 2026.
How do different lighting conditions in Studio affect clothing appearance?
Lighting plays a significant role in how your clothing appears. In Roblox Studio, you can adjust environmental lighting settings (e.g., day/night cycles, shadows, sun position). Test your clothing under various lighting conditions, from bright outdoor scenes to dimly lit interiors. This helps reveal how colors and textures react to different light sources. For instance, subtle transparency issues might become glaringly obvious under certain light angles, or metallic textures might not reflect as intended. Ensuring your clothing looks good in diverse environments guarantees a consistent user experience regardless of the game's setting.
In-Game Testing and Collaborative Feedback
What's the process for in-game testing with friends?
In-game testing is crucial because it simulates the actual user experience, something a static 3D preview cannot fully replicate. Upload your clothing as a 'T-Shirt' (for quick, cheap testing, as shirts and pants cost Robux) or a test shirt/pants to a private game you own. Invite friends or trusted testers. Have them try on the clothing, run, jump, dance, and use emotes. Observe their movements, how the clothing interacts with different animations, and if any clipping occurs. Gather direct feedback on fit, feel, and overall aesthetic. This real-world perspective is invaluable for catching dynamic issues and validating your design choices. Remember, in 2026, dynamic avatars and layered clothing mean more complex interactions.
How can I ensure my clothing fits different body types and animations in-game?
When conducting in-game tests, specifically ask your testers to utilize various body packages and animations. Have them equip different R6 and R15 body types, including those with extreme proportions (e.g., blocky, slim, muscular builds). Ask them to perform a range of animations like running, sitting, and specific emotes to stress-test the clothing's stretch and deformation. Pay close attention to joint areas such as elbows, knees, and shoulders, as these are common points for clipping. Encourage diverse feedback from testers with different preferences and avatar styles. This comprehensive approach ensures your clothing has broad appeal and functions seamlessly across the vast spectrum of Roblox avatars.
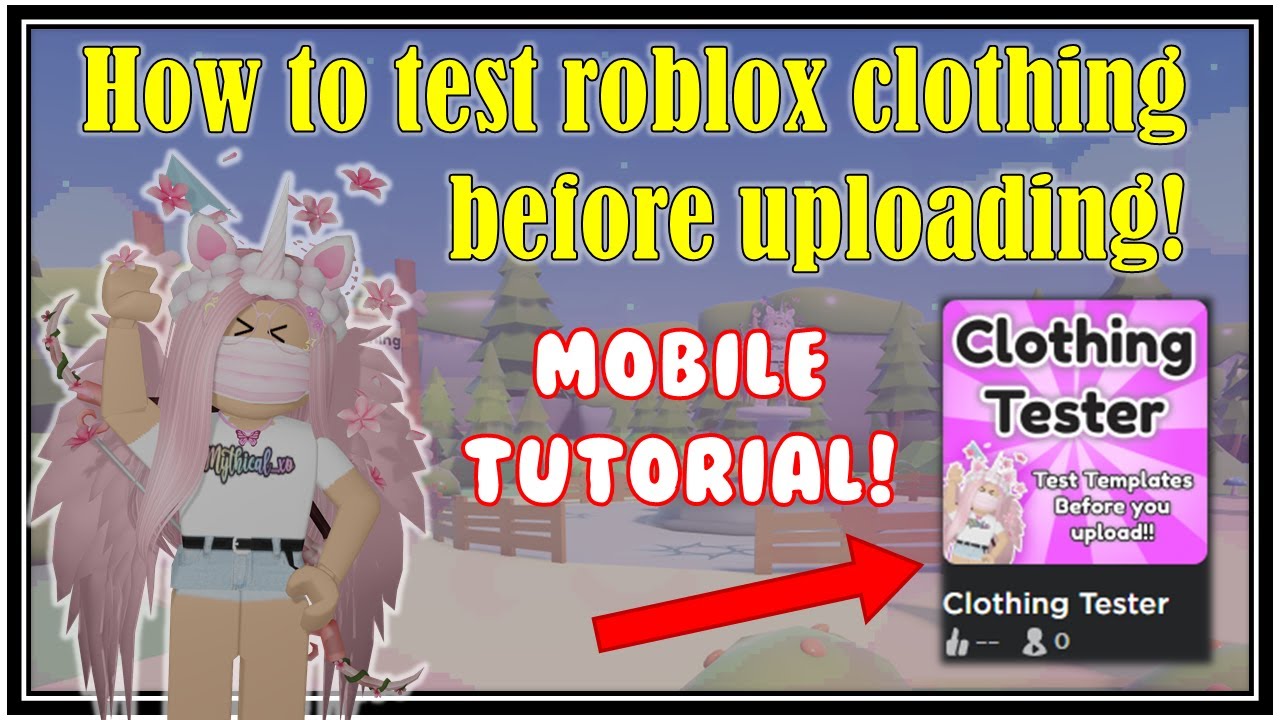
What are the best practices for collecting and implementing feedback during testing?
Establish a clear feedback channel, such as a Discord server or a simple survey. Ask specific questions: 'Does anything clip?', 'Are colors true to expectation?', 'How does it look during animation X?', 'Any transparent spots?'. Encourage screenshots or short video clips from testers. Categorize feedback by severity and type (e.g., critical bugs, minor aesthetic changes). Prioritize critical issues for immediate fixes. When implementing feedback, make iterative changes and re-test. Thank your testers genuinely, as their insights are pivotal to refining your designs. In 2026, leveraging community insights is a cornerstone of successful creation.
Common Issues and Advanced Testing Techniques (2026)
What are common issues to look for during Roblox clothing testing?
Common issues include:
- Transparency Problems: Unwanted white boxes or artifacts where transparency should be. This often stems from incorrect alpha channel settings in your image editor.
- Clipping: Clothing parts intersecting with the avatar's body or other accessories, especially during animations or on different body types.
- Texture Bleeding: Colors from one part of the texture appearing on another, often due to template misalignment or stretching.
- Low Resolution/Blurriness: Textures appearing pixelated or indistinct, indicating an insufficiently high-resolution source image.
- Moderation Flags: Designs containing inappropriate content, copyrighted material, or misleading visuals that violate Roblox's community standards.
- Asymmetry: Unintentional differences between mirrored sides of clothing, especially noticeable on symmetrical designs.
- Material Properties: For layered clothing, ensuring fabric and material settings behave as expected with lighting and movement.
Each of these can lead to a rejected upload or a poor user experience, making vigilant pre-upload checks essential.
How do I test animated or layered clothing (2026 specific)?
Testing animated and layered clothing, a prominent feature in 2026, requires an evolved approach. For layered clothing, ensure that each layer interacts correctly with those above and below it. Check for clipping, unnatural deformations, and how different fabric materials behave. Use Roblox Studio's 'Accessory Fitting Tool' to adjust cage meshes and asset properties, ensuring seamless integration. For animated elements (e.g., swaying fabric, dynamic particles), test thoroughly in-game. Observe how these elements move with the avatar's animations, ensuring they remain visually appealing and don't glitch or break. This often involves scripting or specific rigging, so collaborate with animators if your design is particularly complex. The goal is fluid, natural motion that enhances the avatar's appearance.
Can I test my clothing on mobile devices and why is it important?
Yes, testing on mobile devices is critically important in 2026, given that a significant portion of Roblox's user base accesses the platform via smartphones and tablets. What looks perfect on a high-end PC might appear distorted, low-resolution, or have performance issues on mobile. Load your test game on various mobile devices (iOS and Android, if possible) to check texture fidelity, loading times, and overall visual integrity. Pay attention to how the clothing scales on smaller screens and if any details are lost. Mobile testing ensures your designs are accessible and appealing to the widest possible audience, providing a consistent high-quality experience across all platforms.
Troubleshooting and Best Practices
How do I save Robux by effective testing?
Effective testing directly translates to Robux savings by minimizing failed uploads. Each failed upload of a shirt or pants item still incurs the upload fee (typically 10 Robux). By rigorously testing in Roblox Studio and private servers before the official upload, you catch errors that would otherwise lead to rejections. This proactive error detection means you only pay for successful, moderation-approved uploads, preventing repeated charges for the same item. Over time, for active creators, this can amount to significant Robux savings, allowing you to invest more in new designs or promotions. In 2026, creators are smarter about their resources, and testing is a prime example of resource optimization.
What are best practices for organizing test files and iterations?
Maintain a structured file system for your designs. Create folders for 'Concepts,' 'Work-in-Progress,' 'Testing Versions,' and 'Final Assets.' Within 'Testing Versions,' use clear naming conventions (e.g., 'Shirt_DesignA_V1_Test1,' 'Shirt_DesignA_V2_MobileTest'). Store all associated files like original templates, edited textures, and feedback notes together. Utilize version control within your image editing software to track changes. This organization streamlines your workflow, makes it easy to revert to previous versions, and ensures you always know which iteration you are testing or preparing for upload. A well-organized creator is an efficient and successful creator in the competitive 2026 Roblox market.
What's the future of Roblox clothing creation and testing (2026 outlook)?
The future of Roblox clothing creation in 2026 is exciting, moving towards even greater realism, dynamic interactions, and user-generated experiences. Expect more sophisticated layered clothing capabilities, advanced physics simulations for fabrics, and potentially AI-assisted design tools that streamline the creation process. Testing will evolve to include more automated checks within Studio, enhanced cross-platform compatibility tools, and community-driven beta programs for early feedback. Creators will need to stay abreast of these technological advancements, continuously adapting their testing methodologies to leverage new features and ensure their designs remain cutting-edge and flawless. The emphasis will shift towards even more immersive and personalized avatar customization.
Conclusion
As we conclude this comprehensive guide on how to test Roblox clothing before uploading, it's clear that meticulous pre-upload verification is not merely an optional step but an indispensable pillar of successful creation in 2026. From leveraging the powerful 3D preview capabilities of Roblox Studio to engaging in dynamic in-game testing with a diverse array of avatars and friends, every stage of the testing process contributes to the integrity and market appeal of your designs. By proactively identifying and rectifying issues like transparency errors, clipping, or texture misalignments, you not only safeguard your precious Robux from failed uploads but also solidify your reputation as a creator committed to quality and excellence. The evolving landscape of Roblox, with its advanced layered clothing and dynamic avatar systems, demands a sophisticated approach to testing, ensuring your virtual apparel shines across all devices and body types. Embrace these strategies, refine your workflow, and empower your creative vision to thrive within Roblox's vibrant and ever-expanding metaverse. Share your favorite Roblox clothing testing tip in the comments below!
Additional Common Questions
How much does it cost to upload clothing on Roblox?
Uploading a shirt or pants item on Roblox typically costs 10 Robux per item. T-shirts are free to upload. This fee is non-refundable, even if the item is rejected by moderation, underscoring the importance of thorough pre-upload testing to avoid wasted Robux and effort.
What is the Roblox clothing template size?
The standard Roblox clothing template size is 585 pixels wide by 559 pixels high. Using this exact dimension is crucial for correct texture mapping and alignment on avatars. Deviating from these dimensions can lead to stretching or misplacement of your design elements. Always start with the official template.
How long does Roblox moderation take for clothing?
Roblox moderation times for clothing can vary, typically ranging from a few minutes to several hours, and sometimes up to 24 hours or more during peak periods or for complex items. Items are reviewed for adherence to community standards, copyright, and appropriateness. Patience is key after submission.
Can I sell clothing I made on Roblox?
Yes, once your clothing items (shirts or pants) are approved by Roblox moderation, you can sell them on the Roblox catalog. You set the price in Robux, and a percentage of sales (typically 70% for Premium subscribers, 30% for others) goes to you, while Roblox takes a commission.
Utilize Roblox Studio's powerful 3D preview for initial checks. Conduct thorough in-game testing with friends for real-world fit. Verify template accuracy and transparency settings meticulously. Understand Roblox's asset moderation guidelines to prevent rejections. Save valuable Robux by identifying errors pre-upload. Ensure high quality and maintain a positive creator reputation. Iterate designs based on feedback from diverse avatar types. Explore advanced testing for layered and animated clothing in 2026.
35


How To Test Roblox Clothing Before Uploading 2026 Roblox Tutorial . HOW TO TEST ROBLOX CLOTHING BEFORE UPLOADING ALL PLATFORMS YouTube . How To Test Your Roblox Clothes Before Sharing Them 5 Ways V4 460px Test Roblox Clothes Step 22 Version 3 . How To TEST Roblox Clothing BEFORE Uploading YouTube . How To TEST Roblox Clothing On MOBILE Before Uploading YouTube


HOW TO TEST ROBLOX CLOTHING BEFORE UPLOADING YouTube . HOW TO TEST ROBLOX CLOTHING BEFORE UPLOADING ALL PLATFORMS YouTube . How To Test Your Roblox Clothing Before Uploading It 2023 Method . HOW TO TEST CLOTHING BEFORE UPLOADING ONTO ROBLOX YouTube . How To Test A Piece Of Clothing Before Uploading It To Roblox Roblox


How To Test Your Roblox Clothes Before Sharing Them 5 Ways V4 460px Test Roblox Clothes Step 9 Version 3 . How To Test A Roblox Shirt Before Uploading Easy Preview Method 2026 Hqdefault . Test Your ROBLOX Templates Before Uploading Clothing Tester YouTube . How To Look At Roblox Clothing Before Uploading YouTube Hqdefault . How To Test Your Roblox Clothes Before Sharing Them 5 Ways V4 460px Test Roblox Clothes Step 8 Version 3


How To Easily Test Your Clothing Without Uploading On Roblox YouTube . How To Test Your Roblox Clothes Before Sharing Them 5 Ways V4 460px Test Roblox Clothes Step 6 Version 4 . How To TRY ON Your Clothing Before Uploading On Roblox YouTube . How To Test Your Roblox Clothes Before Sharing Them 5 Ways V4 460px Test Roblox Clothes Step 2 Version 3 . How To Try On Roblox Clothes Before Uploading Shorts YouTube


How To Test Your Roblox Clothes Before Sharing Them 5 Ways Test Roblox Clothes Step 40 Version 2 . How To Test Your Roblox Clothes Before Sharing Them 5 Ways V4 460px Test Roblox Clothes Step 38 Version 3 . How To Test Your Roblox Clothes Before Sharing Them 5 Ways V4 460px Test Roblox Clothes Step 1 Version 3 . How To Test Your Roblox Clothes Before Sharing Them 5 Ways V4 460px Test Roblox Clothes Step 10 Version 3 . Roblox Clothes Tester Preview Shirts And Pants Before You Upload Roblox Video Thumbnail


How To UPLOAD CLOTHES On Roblox FULL GUIDE 2026 YouTube . Roblox Clothes Tester Preview Shirts And Pants Before You Upload Template Pants R15 07262019 . HOW TO TEST ROBLOX CLOTHING BEFORE UPLOADING ALL PLATFORMS Shorts Maxres2 . Test Classic Clothing Roblox Creator Hub Block Avatar Dressed . How To Test Your Roblox Clothes Before Sharing Them 5 Ways Crop 375 250 333px Nowatermark Create A Shirt In Roblox Step 25 Version 2


How To Test Your Roblox Clothes Before Sharing Them 5 Ways V4 460px Test Roblox Clothes Step 5 Version 3 . How To Test Your Roblox Clothes Before Sharing Them 5 Ways V4 460px Test Roblox Clothes Step 15 Version 3 . How To Test Your Roblox Clothes Before Sharing Them 5 Ways V4 460px Test Roblox Clothes Step 21 Version 3 . Roblox Shirt Test Your Guide To Getting It Right . How To Test Your Roblox Clothes Before Sharing Them 5 Ways V4 460px Test Roblox Clothes Step 12 Version 3