Unlock your creative potential in Roblox Studio by learning how to import your personalized Roblox avatar This comprehensive guide breaks down the process into easy-to-follow steps ensuring even busy gamers can effortlessly bring their unique character designs into their game projects For players juggling work family and gaming time understanding efficient workflows like importing avatars directly saves precious minutes and enhances the development experience Discover the essential tools and techniques to customize your in-game presence or design interactive experiences featuring your own persona Dive into practical tips for overcoming common import challenges and optimize your creations for peak performance in Roblox Studio This resource is tailored for the modern US gamer who values skill-building social play and staying current with platform capabilities without the unnecessary hype or time-consuming trial and error Learn how to make your mark in the Roblox metaverse today
How do I quickly get my custom Roblox character into Studio without rebuilding it?
As gamers balancing life and play, we know every minute counts. The fastest way to bring your unique Roblox character into Studio is by using a specialized plugin like "Load Character Pro" or "Load Character Lite". These tools allow you to type in a Roblox username (your own or a friend's) and instantly spawn their exact avatar model into your workspace, complete with all their gear and accessories. This saves immense time compared to manually recreating outfits and character parts, letting you focus on game design.
What's the main benefit of having my own Roblox avatar in my Studio project?
Having your own Roblox avatar in your Studio project offers significant benefits for personalization and development efficiency. Beyond just seeing yourself in your creations, it acts as a perfect reference for scaling objects, testing animations, or designing tailored player experiences. For busy creators, this means you can quickly prototype how your game interacts with a familiar character model, ensuring better gameplay and a more authentic feel. It's a fantastic way to immerse yourself deeper into your own game world and test things from a player's perspective, without needing to publish and playtest constantly.
Are there any free tools or methods to import avatars into Roblox Studio?
Absolutely! The primary and most popular method for importing avatars is through free community-made plugins available on the Roblox Creator Marketplace. "Load Character Pro" by AlreadyPro is a long-standing favorite, offering robust features for loading any avatar by username or UserId. Alternatively, some developers might use more advanced methods like manually saving their avatar from the client and importing the model, but for most creators, these plugins are the simplest and most efficient free solution. Always check plugin reviews for safety and functionality before installing.
Why might my imported avatar appear incorrectly or have missing parts in Studio?
It's a common hiccup when importing! If your avatar appears incomplete or disfigured, it's often due to a few reasons. Sometimes, very new or experimental avatar items (like certain Layered Clothing features) might not load perfectly with older plugin versions. Network issues during the import process can also lead to missing parts if the plugin fails to fetch all asset IDs. Ensure your plugin is updated and try importing again. Also, check the Output window in Studio for any errors, which can provide clues. Occasionally, certain complex accessories might be separate models, requiring a quick re-grouping.
Can I make changes to my imported avatar in Roblox Studio and save them?
Yes, you can absolutely make changes! Once your avatar is imported into Studio, it behaves like any other model. You can ungroup it, modify individual body parts, change colors, add accessories, re-rig it, or even apply custom animations. However, remember that these changes are local to your Studio project. Saving these modifications won't update your actual Roblox avatar profile. If you want to reuse a custom version, you'll need to save it as a new model within your Studio assets or to your inventory, making it easy to re-insert into future projects.
Is importing avatars resource-intensive for my Roblox Studio project?
For a single avatar or a few, it's generally not resource-intensive. Roblox Studio and its engine are optimized to handle character models efficiently. However, if you import dozens or hundreds of highly detailed avatars into a single workspace, especially those with many mesh parts or complex textures, you might start to notice a performance dip in Studio, impacting frame rate or loading times. Modern hardware typically handles this well. For published games, the engine efficiently streams assets, so performance is usually more about overall game complexity than just the presence of a few avatars. Always optimize by removing unnecessary parts if your imported avatar is only for visual reference.
What are some creative ways to use my imported Roblox avatar in my game designs?
Beyond simple representation, your imported avatar can be a powerful creative asset! Use it to design bespoke clothing or armor that perfectly fits your character's proportions, ensuring a seamless visual. It's excellent for creating custom animations or emotes tailored to your specific character rig. You could also feature your avatar as an NPC, a quest giver, or even a main character in a story-driven experience. For social game developers, having a recognizable personal avatar can also be a unique way to brand your creations or create fan interactions within your game. The possibilities are truly endless for personalizing your game worlds.
Hey fellow gamers! Ever wanted to see your carefully crafted Roblox avatar, the one you've spent hours perfecting with unique outfits and accessories, actually *inside* your Roblox Studio projects? For many of us balancing a job, family, and our passion for gaming, time is precious. We want to dive into creation without wrestling with complicated setups or obscure menus. You’re not alone if you’ve dreamt of using your main character as a placeholder, a reference, or even a star in your own Roblox experiences. This isn't just about vanity; it's about making your creative process smoother, more personal, and ultimately, more fun.
In the vibrant world of Roblox, where 87% of US gamers regularly spend an average of 10+ hours a week, and social gaming continues its mobile dominance, bringing your personal touch to your creations is key. Forget the generic Rigs; imagine your avatar interacting with your custom scripts or appearing in your game's cutscenes. This guide is your no-nonsense pathway to understanding exactly how to import your Roblox avatar into Roblox Studio, saving you valuable time and unlocking new creative possibilities. We’ll cover everything from the basic steps to troubleshooting, ensuring you can quickly get back to what matters most: building awesome games and unwinding with your favorite hobby. Let's make your game development journey as smooth and rewarding as a perfect headshot!
What is the easiest way to import my Roblox avatar into Roblox Studio?
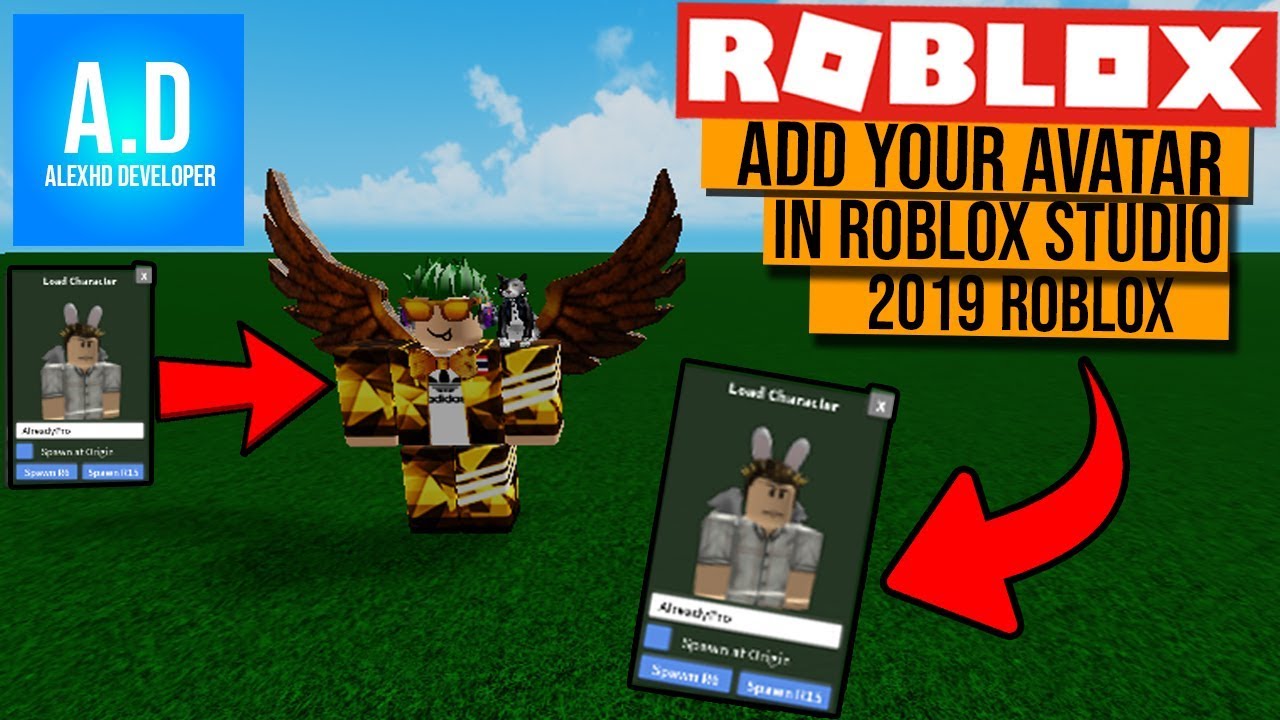
For most gamers and developers, the absolute easiest and most common way to import your Roblox avatar into Roblox Studio is by utilizing a community-created plugin. The "Load Character Pro" or "Load Character Lite" plugins are widely recognized and incredibly user-friendly. These tools streamline a process that would otherwise involve manual asset IDs and complex rigging, letting you focus on your creative vision rather than technical hurdles. This method is a game-changer for those of us who value efficiency and want to quickly bring our personal touch into our projects, especially after a long day of work.
To use these plugins, you first need to open Roblox Studio. From there, navigate to the "Plugins" tab in the top menu. Search for "Load Character Pro" or "Load Character Lite" in the Roblox Creator Marketplace directly within Studio, or find them on the Roblox website and install them. Once installed and enabled, a new button or panel will appear under your "Plugins" tab. Simply click it, type in your Roblox username (or any other username you wish to load), and hit enter. In moments, your character model will appear in your Studio workspace, fully rigged and ready for interaction. This instant gratification is perfect for the 87% of US gamers who regularly spend time on platforms like Roblox, providing a seamless transition from player to creator.
Why would I want to import my personal avatar into Roblox Studio?
Importing your personal Roblox avatar into Studio offers a wealth of creative and practical advantages that can significantly enhance your game development process. Firstly, it allows for unparalleled personalization. Imagine creating a cutscene where *your* avatar is the hero, or building a showcase game where visitors can see *your* unique style reflected in the environment. This personal connection makes development more engaging and can be a fantastic motivator, especially when balancing gaming with a busy life. It transitions your identity from player to creator, giving you a tangible stake in the virtual worlds you build.
Beyond personal expression, importing your avatar is incredibly useful for practical development. You can use your character model as a reference for scaling objects, testing custom animations to ensure they look natural on a familiar rig, or even designing bespoke clothing and armor that perfectly fits your avatar's proportions. This removes the guesswork often associated with generic character models, leading to better quality assets and more polished experiences. For developers aiming to create social hubs or role-playing games, having player models readily available for testing interactions or creating NPCs (Non-Player Characters) that resemble real players adds a layer of authenticity. It’s about leveraging your existing digital identity to build richer, more immersive games for yourself and others.
What tools or plugins do I need to import my Roblox avatar?
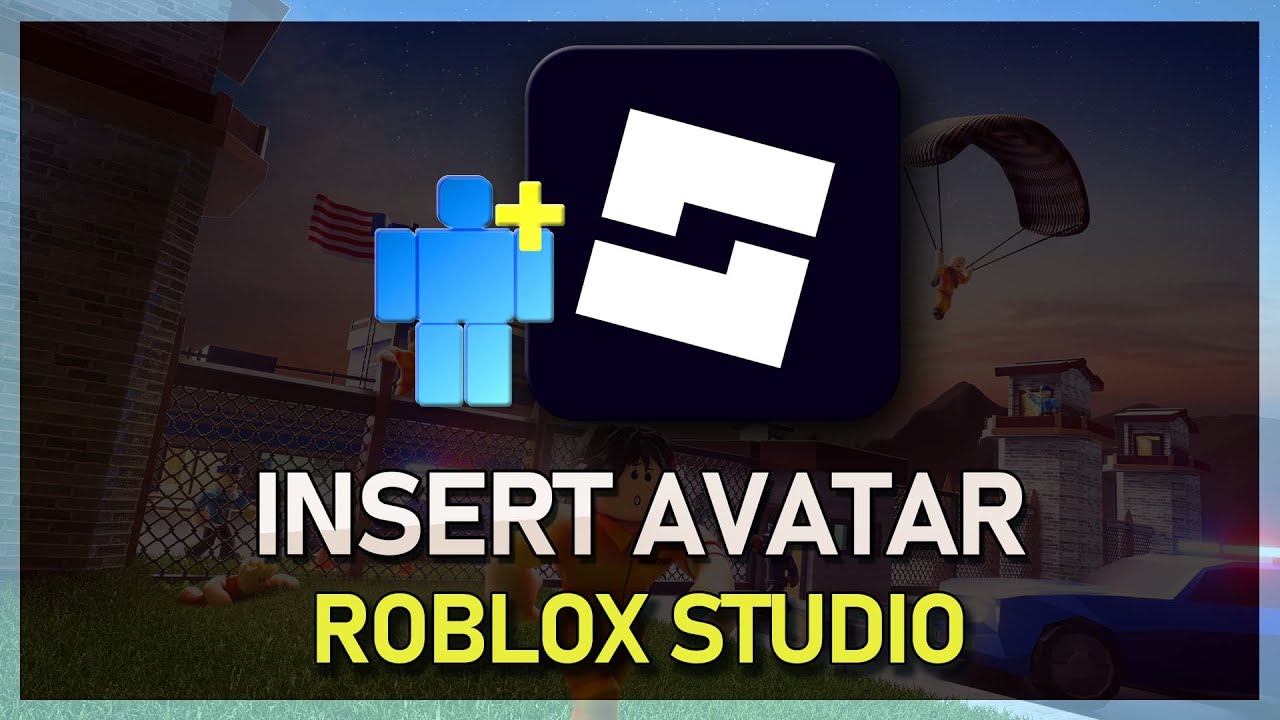
The primary tool you'll need for seamless avatar importing is a dedicated plugin. As mentioned, "Load Character Pro" by AlreadyPro is arguably the most popular and feature-rich option, while "Load Character Lite" offers a more stripped-down, yet still effective, alternative. These plugins are crucial because Roblox Studio does not have a built-in "import my current avatar" function. They act as bridges, fetching your avatar's specific asset IDs (for body parts, clothing, accessories) from the Roblox servers and assembling them into a fully rigged model within your Studio workspace.
To acquire these plugins, simply open Roblox Studio, navigate to the "Plugins" tab, and then click on "Manage Plugins" or search directly in the Creator Marketplace through the search bar. Type in "Load Character" and you'll typically find the top results. Always check the plugin's creator, its reviews, and the number of installations to ensure it's reputable and well-maintained. While some advanced users might try to manually extract avatar data using web requests and APIs, these plugins automate that complex process, making it accessible to everyone from hobbyist creators to seasoned developers. For the average gamer who values efficiency and reliable tools, a trusted Load Character plugin is indispensable.
Can I import any Roblox avatar, not just my own?
Absolutely! One of the fantastic features of "Load Character" plugins is their ability to import *any* publicly accessible Roblox avatar, not just your own. This means you can type in a friend's username, a popular Roblox content creator's username, or even the name of a famous Roblox character, and the plugin will attempt to load their current avatar into your Studio environment. This capability is incredibly useful for a variety of creative purposes, aligning with the strong social gaming trends prevalent across platforms where players love to interact with and represent their friends or admired figures.
For example, you might want to create a fan experience featuring your favorite Roblox streamer's avatar, or design a game where players interact with NPCs that look like well-known Roblox figures. You could also use this to test how different avatar types or body styles interact with your game's mechanics or environment. This flexibility is a huge boon for collaborative projects or simply for creative experimentation. Just ensure the username is spelled correctly, and the plugin will do the rest, fetching their unique look directly from Roblox's servers. This capability empowers you to bring a wider range of character diversity into your projects effortlessly.
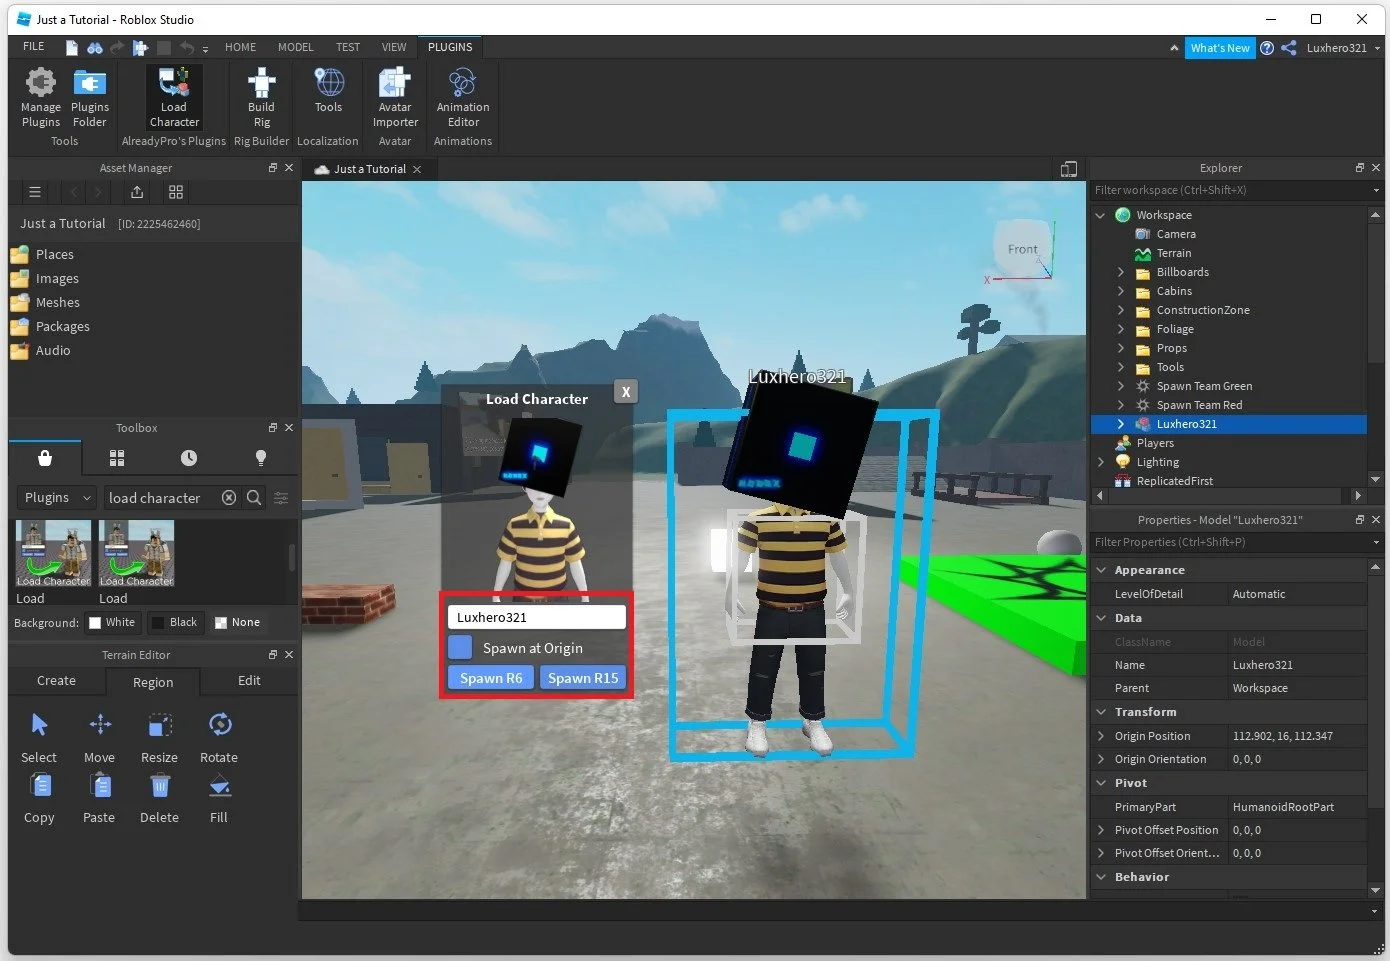
How do I load my avatar's character model using a plugin?
Loading your avatar using a plugin is a straightforward process, designed for quick integration so you can get back to building. Here's a step-by-step guide:
Open Roblox Studio: Launch the application and open the project you wish to work on, or start a new baseplate.
Navigate to the Plugins Tab: Look for the "Plugins" tab located at the top of your Studio window. Click on it.
Locate the Load Character Plugin: Once on the Plugins tab, find the icon for your "Load Character Pro" or "Load Character Lite" plugin. It usually has a distinct icon, like a person or a character model.
Activate the Plugin: Click on the plugin's icon. A small window or panel should appear, typically with an input field for a username or UserId.
Enter Username/UserId: In the input field, type your exact Roblox username. If you're loading another player's avatar, make sure their username is correct. Some plugins also allow you to input a UserId for more precise targeting.
Load Character: Click the "Load" or "Spawn" button within the plugin's window. You might also have options to load as an R6 or R15 model; choose the one that suits your project's needs (R15 is generally more modern and flexible).
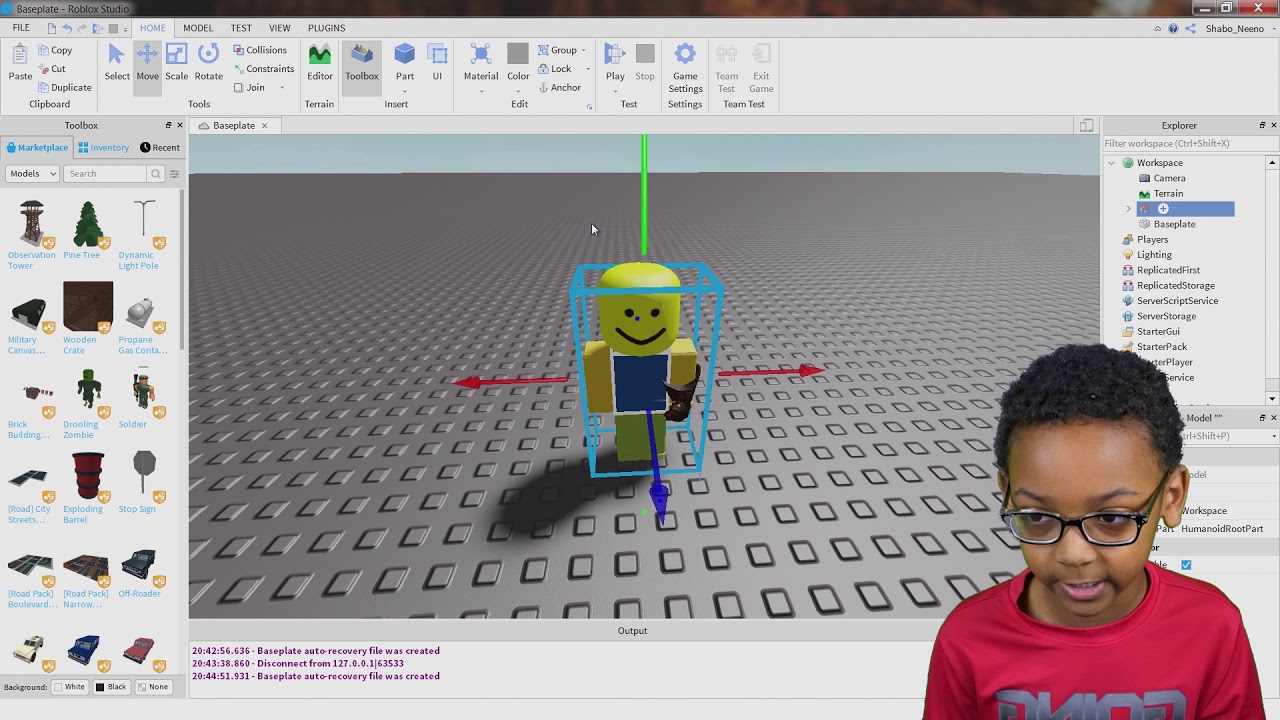
Verify Import: Your avatar model should now appear in your Studio workspace. It will usually spawn directly in front of your camera or at the origin point (0,0,0). You can then select it in the Explorer window, move it, scale it, or begin modifying it.
This streamlined process allows you to quickly introduce your desired character model, a valuable trick for balancing your creative endeavors with your daily responsibilities, ensuring you make the most of your gaming time.
What if my avatar doesn't look right after importing it?
It can be a little frustrating when your carefully chosen avatar doesn't quite look right after importing it into Studio. Don't worry, this is a common occurrence, and there are several troubleshooting steps you can take. First, ensure your "Load Character" plugin is the most up-to-date version. Plugin developers frequently release updates to support new avatar items, layered clothing features, and other Roblox platform changes. An outdated plugin might struggle to correctly fetch or render the latest accessories.
Secondly, check your internet connection. The plugin needs to communicate with Roblox servers to retrieve all the individual asset IDs (meshes, textures, accessories) that make up your avatar. A flaky connection can lead to incomplete loads, resulting in missing body parts, clothes, or accessories. Try re-importing the avatar after verifying your connection. Also, open the "Output" window in Studio (View tab > Output). This window often displays error messages if specific assets failed to load, giving you clues about what went wrong. For highly complex or experimental avatar items, sometimes the plugin might not fully support them yet; in such cases, try a slightly simpler avatar configuration to see if that resolves the issue. Remember, patience and a systematic approach often solve these minor glitches.
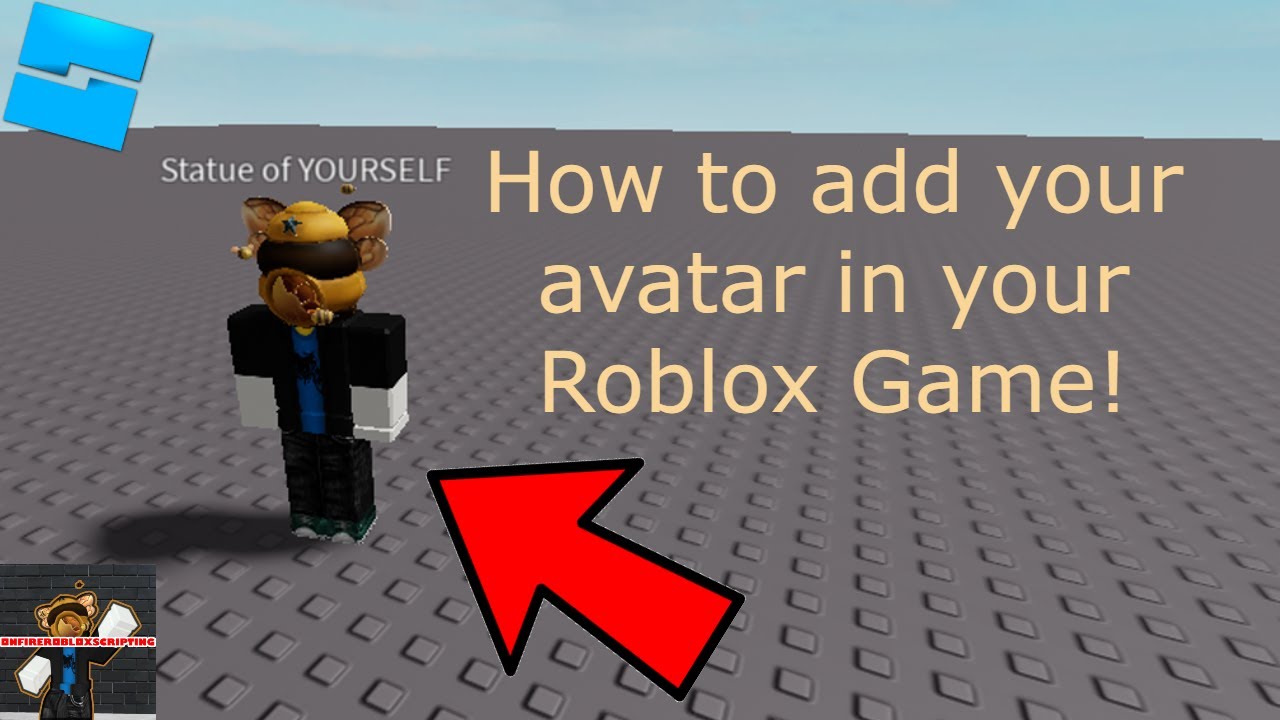
How can I use my imported avatar in my game projects?
Once your avatar is successfully imported into Roblox Studio, the possibilities for integrating it into your game projects are immense. Think of your imported avatar as a fully rigged, customizable model, just like any other asset you might create or import. Here are some popular ways US gamers are leveraging their personal characters:
Character Reference: Use it as a visual guide to ensure the scale of your world, props, and UI elements feel right from a player's perspective. It helps ground your designs in relatable proportions.
Custom Animations: Apply new animations you've created within Studio directly to your imported avatar. This is excellent for testing new emotes, walk cycles, or combat moves on a familiar rig.
NPCs and Storytelling: Turn your avatar into an NPC. Give it dialogue, assign quests, or even make it a boss character. This adds a personal touch to your game's narrative and can be particularly engaging for social games where players recognize familiar character styles.
Custom Clothing/Accessory Design: Use your avatar as a mannequin to design custom clothing, armor, or accessories that perfectly fit Roblox character proportions. You can create unique items for your game that truly complement the existing Roblox aesthetic.
Showcase and Portfolio: For aspiring creators, featuring your personal avatar in a showcase game is a great way to demonstrate your skills and creativity. It's a professional and personal touch for your development portfolio.
Debugging and Playtesting: Rapidly test game mechanics, collision detection, and environmental interactions using your own character model. This allows for quick iteration and performance optimization, which is key for busy developers who need efficient workflows.
The flexibility of having your avatar in Studio truly opens up new avenues for creative expression and practical development, allowing you to build games that feel uniquely yours.
Are there performance considerations when importing detailed avatars?
For modern US gamers who value performance optimization, understanding the impact of detailed avatars on your Studio project is crucial. Generally, importing a single or even a few standard Roblox avatars won't significantly impact your Studio's performance. The Roblox engine is highly optimized for character models, as they are fundamental to almost every experience. However, if you start importing dozens or hundreds of highly detailed avatars, especially those with numerous mesh parts, complex textures, or heavy accessory counts, you might begin to notice a performance dip.
In Roblox Studio itself, a very high part count from many detailed avatars can sometimes lead to lower frame rates or slower loading times, particularly on older or less powerful hardware. For the actual game runtime, Roblox employs efficient streaming techniques, meaning assets are only loaded when needed. So, a character that's far away might not be fully loaded, reducing immediate impact. Nevertheless, best practices for performance optimization include:
Limit Unnecessary Detail: If your imported avatar is purely for reference and won't be seen up close, consider simplifying it by removing hidden parts or combining meshes.
Cull Unused Assets: Ensure you only keep the parts of the avatar you truly need. If it's a static reference, you might not need a fully functional rig.
Use Instances Efficiently: If you need multiple copies of the same avatar, consider using instancing or duplicating a pre-optimized version rather than importing fresh ones each time.
Ultimately, modern gaming rigs are capable, but being mindful of asset complexity will always contribute to a smoother development and play experience.
What are some advanced tips for working with imported avatars?
Beyond the basics, there are several advanced tips that can help you get the most out of your imported avatars in Roblox Studio, turning them into truly powerful development assets:
Creating Custom Rigs: While imported avatars come with a standard R15 or R6 rig, you can modify it. For unique animation needs, skilled developers might detach and re-weld parts, add new joints, or even create entirely custom rigs based on the imported model, then use tools like the Animation Editor.
Saving as Custom Templates: Once you've imported and perhaps optimized an avatar, save it as a model to your toolbox or group it into a new Model asset. This creates a reusable template, allowing you to quickly insert your pre-configured avatar into future projects without needing to re-import it every time. This is a massive time-saver for repetitive tasks.
Scripting Avatar Interactions: Your imported avatar can be a canvas for scripting. Attach scripts to its parts to make it react to player input, interact with the environment, or even have AI behaviors. This is fundamental for creating engaging NPCs or interactive tutorials featuring a personalized character.
Layered Clothing Development: With the rise of Layered Clothing, using your avatar as a direct reference for creating compatible 3D clothing assets is an advanced technique. You can model your garments directly on your imported character, ensuring perfect fit and deformation.
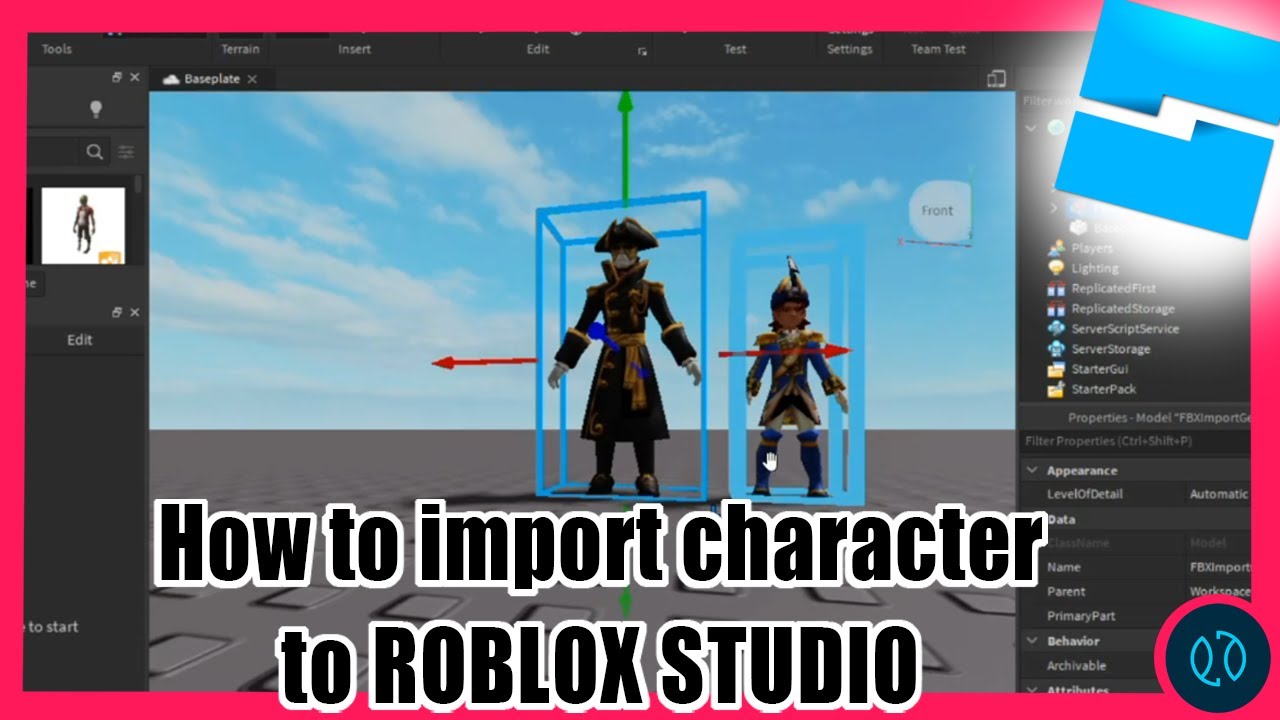
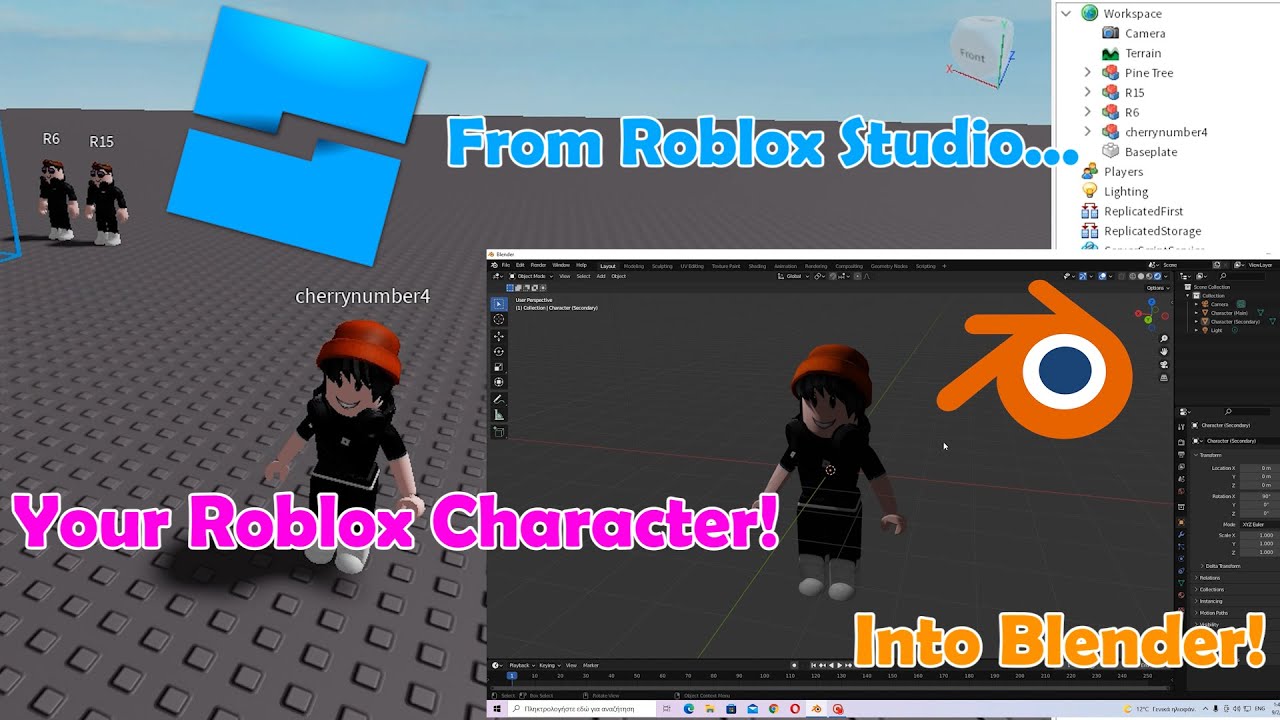
Exporting for External Editing: For truly advanced workflows, you can export your imported avatar (or parts of it) as an FBX file. This allows you to bring it into 3D modeling software like Blender for detailed sculpting, re-texturing, or complex rigging, then re-import the optimized model back into Studio. This is usually reserved for highly customized projects requiring external artistic flair.
These techniques transform your imported avatar from a mere placeholder into a versatile tool for high-level game design.
How can I troubleshoot common issues when importing avatars?
When "how to import your roblox avatar into roblox studio" hits a snag, troubleshooting efficiently is key to getting back to your creative flow. Here's a practical guide to address frequent problems:
Plugin Update Check: Always ensure your "Load Character" plugin is the latest version. Outdated plugins are the culprit for many issues, especially with Roblox's frequent updates to avatar features like layered clothing or new body types. Reinstalling it might also help.
Internet Connectivity: Verify you have a stable internet connection. The plugin needs to fetch numerous assets from Roblox servers. A choppy connection can lead to incomplete imports where parts are missing.
Correct Username/ID: Double-check the spelling of the username or the accuracy of the UserId you entered. A single typo will prevent the avatar from loading.
Studio Output Window: Keep an eye on the "Output" window (View tab > Output). Error messages here are invaluable for diagnosing problems. They might indicate specific asset failures or permissions issues.
R6 vs. R15: Ensure you're selecting the correct rig type (R6 or R15) in the plugin if it offers that option, and that it matches the rig type your game expects or is compatible with. While R15 is standard, some older games might still rely on R6.
Asset Private Status: If you're trying to load a friend's avatar, ensure their profile and inventory are public. If their assets are set to private, the plugin won't be able to retrieve them.
Simplify Avatar: For stubborn cases, try modifying your Roblox avatar to a simpler configuration (fewer accessories, standard body parts) and then attempt to import. If this works, it suggests a specific complex accessory might be causing the issue.
Restart Studio: Sometimes, a simple restart of Roblox Studio can clear up transient bugs or memory issues preventing a successful import.
By systematically going through these steps, you can quickly diagnose and resolve most avatar import problems, getting you back to developing your next great Roblox experience.
What are the best practices for managing avatar assets in Studio?
Effective asset management is crucial for any creator, especially those balancing multiple life commitments. When working with imported Roblox avatars in Studio, adopting best practices ensures a clean, organized, and efficient workflow. This directly translates to smoother development and less time wasted on clutter, which is a major pain point for busy gamers.
Organize in Folders: Immediately upon importing an avatar, group it into a Model and rename it clearly (e.g., "MyAvatar_Reference" or "NPC_JohnDoe"). Place these models into dedicated folders within the Explorer window, such as "Characters," "NPCs," or "References." This keeps your Workspace tidy and makes finding assets easy.
Rename Parts Clearly: If you modify parts of the avatar, rename them descriptively. "LeftArm" is better than "Part" or "MeshPart." This helps immensely during scripting or when collaborating with others.
Use Reference Models: If you only need an avatar for visual scaling or pose reference, consider stripping away unnecessary scripts, welds, or even entire hidden body parts to reduce complexity and improve Studio performance. Save this optimized version as a "Reference Model."
Save to Toolbox/Assets: For avatars you frequently use or custom versions you've modified, save them to your Roblox inventory as models or to your Studio local assets. This allows for quick drag-and-drop integration into any new project without re-importing.
Version Control (for complex projects): For larger projects involving multiple custom avatars, consider using external version control systems like Git. While not directly supported by Studio, saving your .rbxl files and assets systematically can help manage changes over time.
Regular Cleanup: Periodically review your Workspace and delete any unused or redundant imported avatars. Clutter can slow down Studio and make your project harder to navigate.
By implementing these practices, you'll ensure your journey with "how to import your roblox avatar into roblox studio" remains efficient, enjoyable, and conducive to creating polished, high-quality games.
Importing your Roblox avatar into Roblox Studio isn't just a technical trick; it's a powerful way to personalize your creations, streamline your workflow, and deepen your connection with the games you build. For the modern gamer balancing life and leisure, efficiency and creative expression go hand-in-hand. By mastering this simple yet impactful skill, you unlock new avenues for design, testing, and storytelling, ensuring your time in Studio is both productive and incredibly rewarding. From creating custom NPCs to perfecting animations on your own unique rig, your avatar can become a cornerstone of your development journey. We've covered the easiest methods, troubleshooting tips, and advanced uses, equipping you with the knowledge to bring your digital self into any project.
So, whether you're building the next viral social experience or a cozy game just for friends, remember that your personalized avatar is a fantastic resource waiting to be utilized. The world of Roblox development is constantly evolving, with new trends like cross-platform play and user-generated content continuing to dominate. Integrating your avatar seamlessly keeps you current and creatively engaged. Now that you know how to import your Roblox avatar into Roblox Studio, go forth and build something amazing! What's your biggest gaming challenge or a creative idea you're working on right now? Comment below!
FAQ Section: Your Quick Avatar Import Questions Answered
Can I import animated avatars? Yes, when you import an avatar using a plugin like Load Character Pro, it typically comes with its default R6 or R15 rig, which is fully capable of being animated within Roblox Studio using the Animation Editor. You can create custom animations for your imported character.
Is it possible to import multiple avatars at once? Most "Load Character" plugins allow you to type in multiple usernames or repeatedly use the tool for different usernames, thus enabling you to import several avatars sequentially into your Studio workspace. You simply activate the plugin for each character you wish to load.
Does importing an avatar violate Roblox's Terms of Service? No, importing publicly available Roblox avatars (your own or others') into Roblox Studio using reputable plugins does not violate Roblox's Terms of Service. These plugins facilitate access to assets that are already part of the Roblox platform for development purposes. Always ensure you're using official or well-vetted plugins.
How do I update an imported avatar if I change my character on Roblox? If you change your avatar's appearance on Roblox, you'll need to re-import it into Studio. The previously imported model is a static copy of your avatar at the time of import. Simply delete the old model in Studio and use your Load Character plugin again to get the updated version.
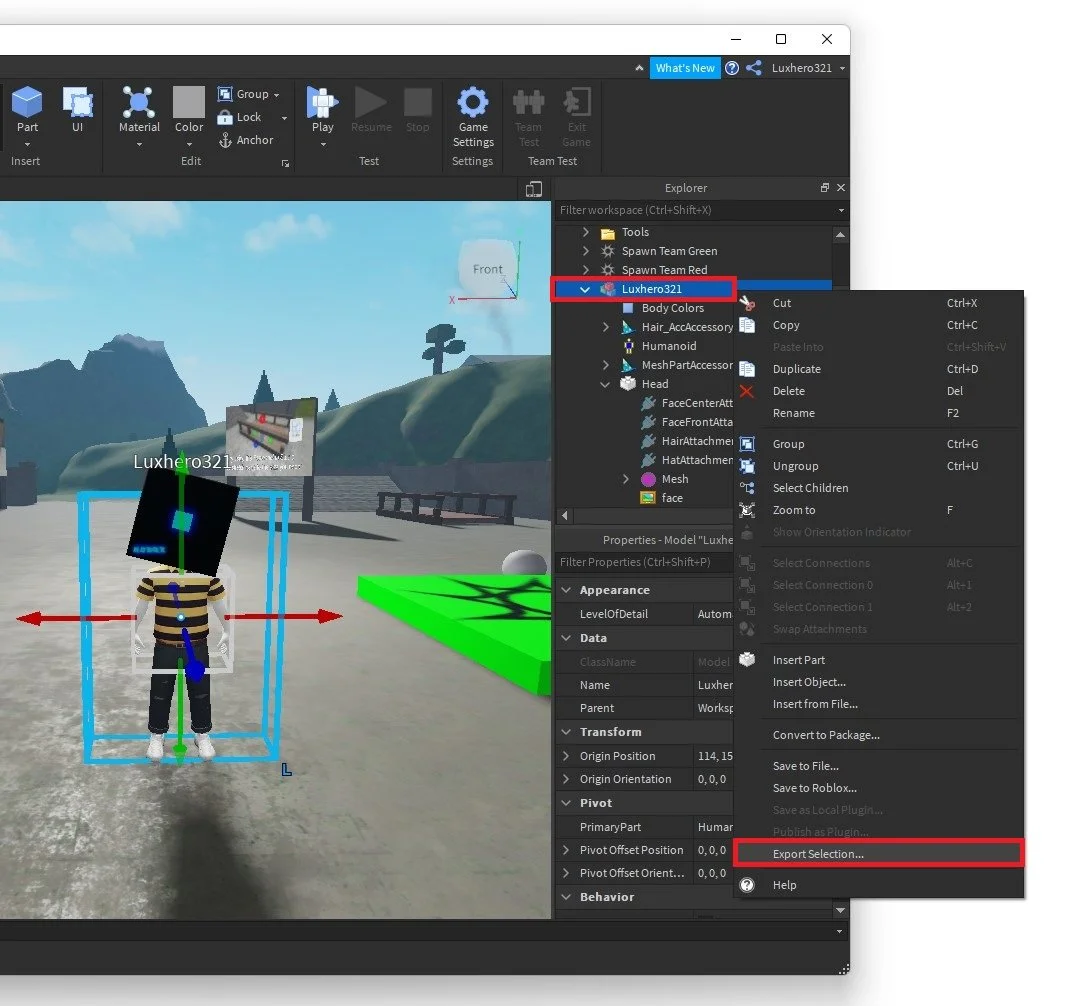
Can I save an imported avatar for future projects? Absolutely! Once you've imported an avatar and perhaps made some modifications or optimizations, you can save it as a model. Right-click the avatar model in the Explorer window, select "Save to Roblox" or "Save to File," and give it a descriptive name. This allows you to easily insert it into any future Studio project.
What's the difference between R6 and R15 avatars in Studio? R6 avatars have 6 body parts and offer simpler animation, often preferred for classic Roblox games. R15 avatars have 15 body parts, allowing for much more detailed and fluid animations, including layered clothing, and are the modern standard. Most plugins let you choose which rig type to import.
Importing your Roblox avatar into Roblox Studio allows for personalized game development and character customization. This process involves using plugins like Load Character and understanding the avatar loading mechanisms. It enhances social gaming elements and creative expression within your projects. Efficiently bring your unique persona into your creations, saving time and fostering skill development. Avoid common pitfalls with practical tips and streamline your workflow for optimal performance.
35


How To Import Your Avatar Into ROBLOX Studio Best Plugins YouTube . How To Add People Roblox Easily Your 2026 Guide . How To Insert And Customize Your Roblox Avatar In Roblox Studio . HOW TO PUT YOUR ROBLOX AVATAR INTO ROBLOX STUDIO YouTube . How To Put Your Roblox Avatar Into Roblox Studio YouTube


How To Import Custom Avatar In Roblox Studio 2022 Guide How To Import Custom Avatar In Roblox Studio 2 980x794 . Import Character Bodies Roblox Creator Hub Avatar 3D Importer . How To Add Your Avatar In Roblox Studio YouTube . Roblox Avatar To Blender Your Easy Guide . How To Add YOUR Roblox Avatar To A Game In Roblox Studio YouTube

How To Add Someone S Avatar In Roblox Studio 2 Easy Ways V4 460px Add Someones Avatar In Roblox Studio Step 1 . How To Import Custom Avatar In Roblox Studio 2022 Guide How To Import Custom Avatar In Roblox Studio . How To Insert A Hat Into Roblox Studio At Lucas Cade Blog . How To Add Avatar IN YOUR Roblox Studio YouTube . How To Add Your Avatar Into Your Roblox Game YouTube


How To Insert Your Avatar In Roblox Studio Step By Step Guide YouTube . How To Add Your Character In Roblox Studio Tech How 7 Export Character Model. How To Import Items Into Roblox Studio 2026 YouTube . Roblox Avatar To Blender Your Easy Guide . How To Change Your Avatar On Roblox Step By Step YouTube


How To Make R6 Avatar In Roblox Studio Easy Guide 2026 YouTube . How To Customize Your Roblox Avatar GameSpot 4553765 How To Customize Roblox Avatar Website . Roblox Avatar To Blender Your Easy Guide . How To Import Your Avatar Into ROBLOX Studio Free Plugin YouTube . How To Import Custom Avatar In Roblox Studio 2022 Guide How To Import Custom Avatar In Roblox Studio 5 1024x536


Roblox Avatar To Blender Your Easy Guide . How To Add Someone S Avatar In Roblox Studio 2 Easy Ways V4 460px Add Someones Avatar In Roblox Studio Step 7 . How To Create A Roblox Avatar Codingal IMage 14 3 . How To Add Someone S Avatar In Roblox Studio 2 Easy Ways V4 460px Add Someones Avatar In Roblox Studio Step 2 . How To Import Your Roblox Avatar Into Roblox Studio AEANET Technology Question Guide.webp


How To Add People Roblox Easily Your 2026 Guide . How To Import A Friends Avatar In Roblox Studios YouTube Hqdefault . How To Add Your Character In Roblox Studio Tech How 5 Spawn In Character. How To Create A Roblox Avatar Codingal Image 14 2 1536x864 . How To Import Custom Avatar In Roblox Studio 2022 Guide How To Import Custom Avatar In Roblox Studio 4 980x523