Welcome to the ultimate guide on how to resize objects in Roblox Studio. This comprehensive resource is designed to navigate you through every aspect of object scaling, from basic manipulations to advanced techniques. Whether you are a budding developer or an experienced builder, understanding precision resizing is crucial for creating immersive and visually appealing games on the Roblox platform. We delve into essential tools, keyboard shortcuts, and common troubleshooting tips that will elevate your building prowess. Learn why accurate scaling impacts gameplay, physics, and overall user experience. This trending topic is vital for anyone aiming to produce high-quality Roblox creations, ensuring your builds are both functional and aesthetically pleasing for players across all devices. Get ready to master resizing and transform your Roblox Studio projects.
Most Asked Questions about How to Resize Objects in Roblox Studio
Welcome, fellow creators, to the ultimate living FAQ about resizing objects in Roblox Studio, meticulously updated for the latest patch! It's super important to keep up with the best practices, and we know you have burning questions. This guide aims to be your one-stop shop for everything related to making your parts and models the perfect size. We've covered everything from basic adjustments to advanced techniques, ensuring your builds are flawless. Let's dive in and get those dimensions just right!
Resizing objects is more than just a visual tweak; it's a foundational skill for crafting immersive and functional Roblox experiences. Understanding how to precisely manipulate sizes affects gameplay, player interaction, and the overall aesthetic of your creations. Whether you're building a grand castle or a tiny detail, mastery over the Scale tool and its related features is non-negotiable for any aspiring or established developer.
This comprehensive FAQ will address common queries, reveal hidden tricks, and guide you through various scenarios. We'll explore how to handle builds, troubleshoot unexpected behaviors, and optimize your workflow. Our goal is to empower you with the knowledge to bring your creative visions to life with unparalleled accuracy and efficiency. Let's get to those questions!
Beginner Questions
How do I make an object bigger or smaller in Roblox Studio?
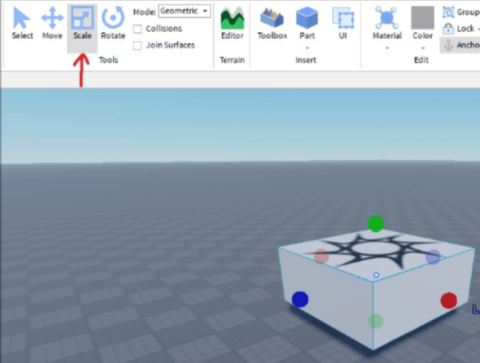
To resize an object, select it in the workspace and click the 'Scale' tool in the 'Home' tab. Colored handles will appear on the object. Drag these handles to stretch or shrink the object along its axes. Holding 'Shift' while dragging resizes uniformly, maintaining aspect ratio. For precise numerical control, use the 'Size' property in the 'Properties' window.
What is the 'Scale' tool and where can I find it?
The 'Scale' tool is Roblox Studio's primary feature for adjusting object dimensions. It's located in the 'Home' tab, within the 'Tools' section, alongside the 'Move' and 'Rotate' tools. When activated, it displays intuitive color-coded handles (red, green, blue) on selected parts, corresponding to the X, Y, and Z axes for easy manipulation.
Can I resize multiple objects at once?
Yes, you absolutely can! To resize multiple objects simultaneously, simply select all the desired parts or models using 'Shift+Click' or by dragging a selection box. Once selected, activate the 'Scale' tool. The handles will appear around the combined bounding box of all selected objects, allowing you to resize them uniformly as a group. This is a huge time-saver!
Why do my objects fall apart or glitch after resizing?
Objects might fall apart or glitch if they are not 'Anchored' or if their 'CanCollide' property is misconfigured. After resizing, especially if parts were previously welded or connected, ensure all essential parts are 'Anchored' in the 'Properties' window to prevent them from moving due to physics. Also, verify that 'CanCollide' is enabled for solid objects.
Builds & Classes
How do I resize a complex model without breaking its parts?
Resizing a complex model is usually straightforward: select the entire model (often by clicking its name in the Explorer window) and then use the 'Scale' tool. All contained parts will scale proportionally, maintaining their relative positions and connections. However, always test after scaling, especially if the model contains scripts that rely on specific object sizes or positions.
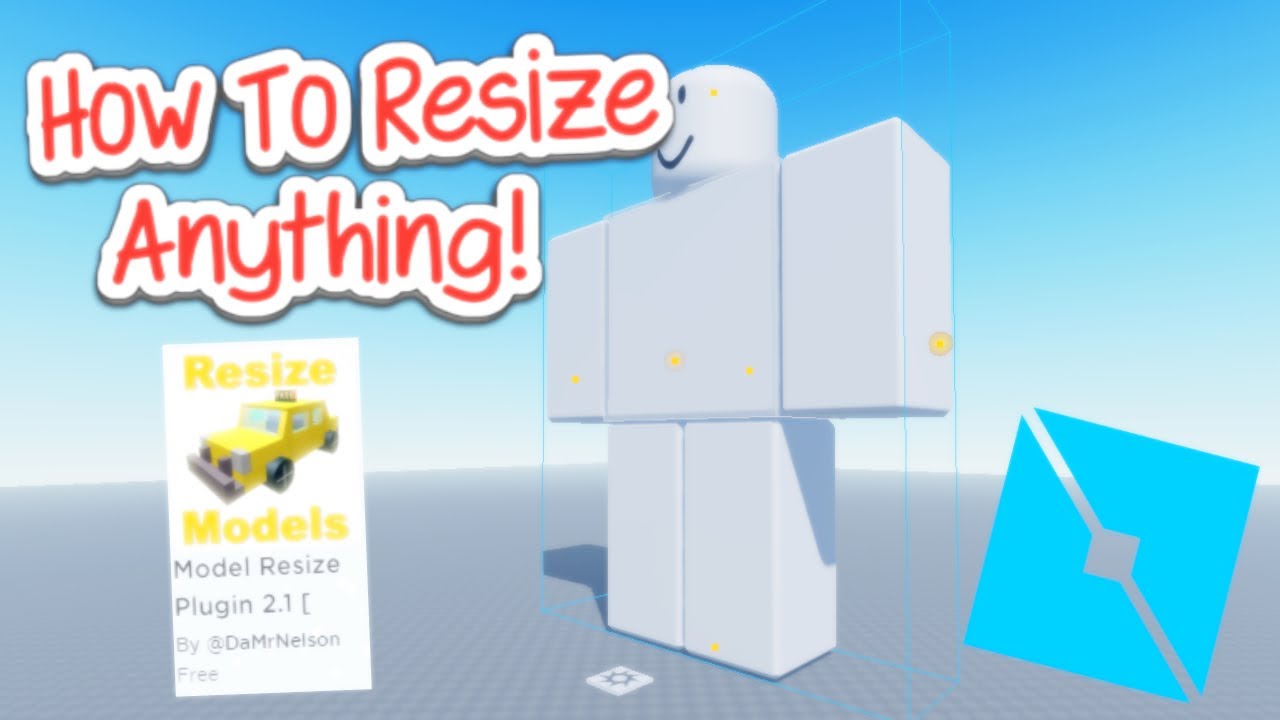
Are there any plugins that help with more advanced resizing?
Definitely! Many experienced builders use plugins for advanced resizing. **F3X Building Tools** (often referred to as 'Btools') is a highly popular option that offers more control, snapping features, and precise numerical input for scaling. Other plugins might offer specialized scaling for terrain or complex meshes. Searching the 'Plugins' tab in Roblox Studio for 'building tools' or 'scale' can reveal excellent options.
Tips & Tricks
What's the best way to resize objects for perfect alignment with a grid?
For perfect grid alignment, first enable 'Snap to Grid' under the 'Model' tab and set your desired increment (e.g., 1 stud). When resizing with the 'Scale' tool, your adjustments will then snap to these increments, ensuring clean alignment. Additionally, you can manually input dimensions in the 'Properties' window using multiples of your grid size for ultimate precision.
How can I uniformly scale an object while keeping its center point fixed?
When using the 'Scale' tool, if you hold 'Ctrl' (or 'Cmd' on Mac) while dragging a handle, the object will scale uniformly from its center point. This is incredibly useful for expanding or contracting objects symmetrically without shifting their overall position in the workspace. Combine with 'Shift' for uniform, center-point scaling while maintaining the aspect ratio.
Is it possible to undo a resize if I make a mistake?
Absolutely! Roblox Studio has a robust undo/redo system. If you make a mistake while resizing, simply press 'Ctrl+Z' (or 'Cmd+Z' on Mac) to undo your last action. You can repeatedly press it to undo multiple steps. This allows for experimentation without fear of permanently messing up your build. Don't be afraid to try different sizes!
Endgame Grind
How does resizing impact game performance in larger experiences?
While basic part resizing usually has minimal impact, excessively scaling very complex mesh parts or models to enormous sizes can potentially affect performance. Larger objects might have more complex collision calculations or require more rendering resources. For most typical game scenarios, simple part resizing won't be an issue, but be mindful with extreme scales in performance-critical areas.
What are best practices for maintaining consistent scale across a large game world?
To maintain consistent scale in a large world, establish a 'unit scale' early in development (e.g., 1 stud = 1 foot). Use a human character model as a reference point for all builds. Consistently use numerical input in the 'Properties' window for precise dimensions. Utilize modular building techniques with predefined part sizes. Regular playtesting with diverse player models helps identify scaling inconsistencies.
Bugs & Fixes
My object keeps snapping to weird sizes when I try to resize it. What's wrong?
This is likely due to your 'Snap to Grid' settings. Go to the 'Model' tab and check the 'Snap to Grid' settings. If the increment is too large, your object will jump to those specific sizes. Reduce the grid increment (e.g., to 0.1 or 0.01 studs) or temporarily disable 'Snap to Grid' if you need very fine, freeform adjustments. Also check if any active plugins are overriding snap settings.
After resizing, my object looks blurry or pixelated. How do I fix this?
Blurriness or pixellation after resizing, especially when making an object much larger, often indicates an issue with the texture applied to the object. If the original texture resolution is low, stretching it over a larger surface will make it appear pixelated. To fix this, you'll need to use higher-resolution textures, or consider dividing the object into smaller parts with tiling textures.
Still have questions? Check out our popular related guides: 'Mastering the Move and Rotate Tools in Roblox Studio' and 'Introduction to Scripting for Roblox Developers'!
Ever wondered, "How do I actually make things bigger or smaller in Roblox Studio without everything looking weird?" You’re not alone! Many new creators, and even some seasoned ones, grapple with the nuances of object resizing. It's a fundamental skill, just like learning to walk before you can run in game development. Getting your object scaling right is super important, it affects everything from a tiny coin to a towering skyscraper in your game world.
Think about it: every successful game on Roblox, from Brookhaven to Adopt Me!, relies on meticulously scaled assets. Accurate resizing isn't just about aesthetics; it profoundly impacts gameplay, collision detection, and how players interact with your world. Imagine a door too small to walk through, or a platform too large to jump over – frustrating, right? This guide will walk you through mastering the resize functionality, ensuring your creations are perfectly proportioned and ready for prime time.
Understanding the Core of Roblox Studio Object Resizing
At its heart, resizing in Roblox Studio is all about manipulating the dimensions of your parts and models. This isn't just a simple stretch; it's a careful process that requires understanding the tools at your disposal. Knowing when and how to use each tool will save you tons of time and frustration. We'll start with the basics, then dive into more advanced tricks and tips that even veteran builders might overlook.
The Essential Scale Tool
The **Scale tool** is your primary weapon in the fight for perfectly sized objects. You'll find it prominently displayed in the Home tab of Roblox Studio, right next to the Move and Rotate tools. When you select an object and activate the Scale tool, you'll see colorful handles appear on your selected part. These handles are your direct interface for resizing.
When you drag these handles, you're essentially stretching or shrinking the object along its local axes. Dragging a red handle changes the size along the X-axis, green for Y-axis, and blue for the Z-axis. This intuitive visual feedback makes quick adjustments incredibly easy. It's like modeling clay, but digital and far less messy.
Precise Resizing with Numerical Input
While dragging handles works great for visual adjustments, sometimes you need absolute precision. For that, the **Properties window** is your best friend. Select your object, then look for the 'Size' property within the Properties window. Here, you'll see three numerical values representing the X, Y, and Z dimensions of your part. You can directly type in exact measurements here, ensuring your object is precisely the size you need. This is especially useful for creating objects that need to fit specific dimensions, like floor tiles or modular building blocks.
It's important to remember that these values are in 'studs,' which is Roblox's unit of measurement. One stud is roughly equivalent to one foot in the real world, giving you a good mental reference point. Understanding studs is key to creating environments with a consistent scale, which is vital for **Roblox Studio building** that feels cohesive and realistic. Consistent scaling makes a huge difference to player immersion.
Keyboard Shortcuts and Hotkeys for Efficiency
Becoming a power user means mastering keyboard shortcuts. These little time-savers can dramatically speed up your workflow. While using the Scale tool, holding down the **Shift key** while dragging a handle will resize the object uniformly, maintaining its aspect ratio. This prevents your objects from looking squashed or stretched disproportionately, a common pitfall. Similarly, you can often snap to grid increments by adjusting your Studio settings, allowing for cleaner, more organized builds without constant manual alignment.
Considering Collisions and Anchoring After Resizing
Resizing objects can sometimes mess with their collision properties or cause them to fall through the world. It’s crucial to ensure your resized parts still behave as intended. Always check an object's **Anchored** property in the Properties window; anchored parts won't move or fall due to physics. Also, be mindful of the **CanCollide** property; if it's off, players and other objects can pass right through it, which is rarely what you want for structural elements. After resizing, especially if you've made significant changes, test your game to ensure collisions are working correctly. This is a critical **game development tip Roblox** that can prevent frustrating bugs.
Advanced Resizing Techniques and Best Practices
Beyond the basics, there are several advanced strategies and best practices that can take your resizing game to the next level. These tips are especially useful when working on more complex projects or trying to achieve specific visual effects.
Using Plugins for Enhanced Resizing
The Roblox Studio marketplace is teeming with fantastic plugins that extend its functionality. Many developers swear by plugins like **F3X Building Tools** or **Building Tools by F3X (Btools)**, which often include advanced resizing options. These tools can offer features like mirroring, precise offsetting, and more sophisticated scaling controls that aren't natively available. If you find yourself repeatedly performing complex resizing tasks, investing time in finding a good plugin can be a game-changer. These plugins can greatly enhance your **Roblox UI design** efforts, allowing for precise placement and scaling of user interface elements.
Resizing Models Versus Individual Parts
When you resize a model, all the parts within that model will scale proportionally. This is incredibly useful for maintaining the integrity of complex creations like characters or vehicles. However, if you only want to resize a single part within a larger model, you'll need to select that individual part first. Understanding the difference between resizing a model and resizing a part is key to efficient building. It's like deciding whether to scale an entire LEGO castle or just a single brick within it.
Scaling with a Reference Object
A common trick is to use a reference object, like a human character dummy, to gauge the size of your builds. This helps ensure that doors are character-height, chairs are character-sitting-height, and so on. Consistency in scale makes your world feel more believable and navigable for players. This practice is a gold-standard **Roblox developer guide** for ensuring player comfort and intuitive gameplay. Why is this important? Because a well-scaled world feels natural to explore.
Common Resizing Pitfalls and How to Avoid Them
Even with the right tools, it's easy to run into problems. Knowing these common issues can help you sidestep them entirely.
Disproportionate Scaling: Accidentally stretching an object too much in one direction without holding Shift can make it look unnatural. Always use the Shift key for uniform scaling unless you specifically intend to stretch it.
Collision Issues: Resizing an object can sometimes alter its collision mesh, causing unexpected behavior. Always re-check 'CanCollide' and test your physics after major changes.
Floating or Sinking Objects: If an object isn't anchored, it might fall through the floor or float away after resizing. Remember to anchor critical parts that shouldn't move.
Performance Impact: While usually not an issue with simple parts, excessively complex meshes scaled to extreme sizes can sometimes impact game performance. Optimize where possible.
The Role of Roblox Scripting Basics in Dynamic Resizing
While manual resizing is your go-to for static builds, sometimes you'll want objects to change size during gameplay. This is where **Roblox scripting basics** come into play. You can use simple Lua scripts to dynamically alter an object's size property based on game events, player interaction, or even time. For example, a power-up might temporarily make a player's character larger, or a growing plant in an environmental simulation. Where would you use this? Imagine an obstacle course where platforms expand and contract, adding an extra layer of challenge. When would you use this? Anytime you need interactive or reactive scaling within your game. This advanced technique opens up a whole new world of possibilities for dynamic game elements.
The Importance of Consistent Scale in Game Design
Why does consistent scale matter so much? A consistent scale creates a sense of realism and immersion. It helps players understand the world around them and navigate it intuitively. If object scales are all over the place, your game can feel disjointed and unprofessional. Developers often create a 'scale guide' at the beginning of a project, determining standard sizes for doors, windows, characters, and other recurring assets. This guide ensures that everyone on the team maintains uniformity, making for a polished final product. It’s an essential part of effective **game development tips Roblox**, ensuring your game feels good to play.
Beginner / Core Concepts
1. Q: I'm new to Roblox Studio. Where do I find the tool to resize objects?
A: Oh, I totally get why this confuses so many people when they're just starting out! Finding the right tool can feel like a treasure hunt. You'll want to head over to the 'Home' tab at the top of Roblox Studio. Look for a section called 'Tools' or 'Transform'. There, you'll spot the 'Scale' tool – it usually looks like a square with arrows pointing outwards, indicating expansion. Click that, select your part, and colorful handles will pop up, ready for you to drag and resize. It’s super intuitive once you find it, and you'll be scaling like a pro in no time! You've got this!
2. Q: How do I make sure my object doesn't get all stretched out and weird when I resize it?
A: This one used to trip me up too, and it’s a common frustration! The key to keeping your object's proportions intact is to hold down the **Shift key** on your keyboard while you’re dragging those colorful handles with the Scale tool. By holding Shift, you tell Roblox Studio,
Mastering the Scale tool in Roblox Studio for precise object adjustments. Utilizing numerical input for exact dimensions and fine-tuning. Understanding collision impacts after resizing and how to mitigate issues. Leveraging keyboard shortcuts for efficiency and speed during building. Exploring advanced resizing techniques and useful plugins for complex builds. Learning how to properly anchor objects post-resizing for stable structures.
35


HOW TO RESIZE ANY MODELS IN ROBLOX STUDIO YouTube . How To Resize A Part In Roblox Studio YouTube . How To Move Scale And Rotate Objects In Roblox Studio 2025 Tutorial . How To Precisely Resize Models In Roblox Studio YouTube . How To Retexture Color Resize Objects Roblox Studio YouTube


How To Scale Objects In Roblox Studio At Robert Goldsmith Blog . Roblox Studio How To Scale Parts And Models Make Things Bigger Or . Resizing Parts Really Small Roblox Studio Tutorial YouTube . How To Scale Objects In Roblox Studio At Robert Goldsmith Blog . How To Scale Objects In Roblox Studio At Robert Goldsmith Blog


This Video Teaches You How To Resize Change The Angle And Move A Hqdefault . ROBLOX Studio How To Create And Delete The Objects In Roblox Studio . How To Scale An Object In Roblox Studio YouTube . How To Scale Objects In Roblox Studio At Robert Goldsmith Blog . How To Scale Objects In Roblox Studio At Robert Goldsmith Blog


How To Scale Objects In Roblox Studio At Robert Goldsmith Blog . How To Master Roblox Studio A 2023 Tutorial Blog Getting Started With Roblox Studio 10 480x363 . How To Scale Objects In Roblox Studio At Robert Goldsmith Blog . How To Scale In Roblox Studio At Elaine Stetler Blog . How To Scale Objects In Roblox Studio At Robert Goldsmith Blog


Size Full Guide To The Size Property And How To Use It Community . Roblox Studio How To Add And Delete Objects YouTube . How To Scale Objects In Roblox Studio At Robert Goldsmith Blog Rotate Objects On An Axis In Roblox Step 6 . How To Change The To A Object In ROBLOX STUDIO YouTube . How To Use Roblox Studio A Step By Step Guide V4 728px Use Roblox Studio Step 13


How To Scale Objects In Roblox Studio At Robert Goldsmith Blog . Ways To Select Multiple Objects In Roblox Studio How To Roblox Studio . How To Flip Objects In Roblox Studio YouTube . ROBLOX Tutorial How To Make Objects In ROBLOX Studio YouTube . How To Flip Objects In Roblox Studio YouTube


How To Scale Objects In Roblox Studio At Robert Goldsmith Blog . Using Object Values To Reference Instances Roblox Studio YouTube . How To Make Transparent Objects In Roblox Studio Roblox Tutorials . Option To Resize Multiple Parts Studio Features Developer Forum . Roblox Studio How To Move Objects In Roblox Studio Went It Doesn T Work