Unlocking the secrets to crafting stunning Roblox accessories is easier than you think. This comprehensive guide navigates you through the essential steps, tools, and creative processes needed to design and publish your unique items. Discover how to transform your imaginative concepts into digital masterpieces, ready for the Roblox metaverse. Learn about the latest 2026 trends in User Generated Content UGC creation, from advanced 3D modeling techniques to optimizing your designs for maximum player appeal. Whether you aspire to launch a thriving virtual brand or simply enjoy personalizing your avatar, this resource provides invaluable insights. We explore everything from initial conceptualization and digital sculpting to texturing, rigging, and finally, uploading your creations for others to enjoy. This information-rich journey will equip you with the knowledge to stand out in the vibrant Roblox creator community. Start your accessory design adventure today.
Welcome to the ultimate living FAQ for mastering Roblox accessory creation in 2026! The Roblox metaverse is always evolving, and so are the tools and techniques for User Generated Content. Whether you are a beginner taking your first steps into 3D modeling or an experienced developer looking to optimize your workflow and monetize your creations, this guide is your go-to resource. We have meticulously gathered and answered over 50 of the most pressing questions from the community, covering everything from initial setup and essential tools to advanced rigging, texturing, and effective monetization strategies. This comprehensive guide provides up-to-the-minute insights, tips, tricks, and solutions to common bugs or challenges you might encounter. Get ready to transform your creative visions into highly sought-after digital assets that captivate millions of players worldwide. Stay ahead of the curve with our expert advice, ensuring your creations are not only stunning but also compliant with the latest Roblox platform updates and trends. Dive in and unlock your full potential as a Roblox accessory designer, making a real impact in the virtual economy.Beginner Questions: Your First Steps into Creation
What are the fundamental requirements to start making Roblox accessories?
Creating Roblox accessories primarily requires access to a computer, internet, and a free Roblox account. Essential software includes Blender for 3D modeling and Roblox Studio for integrating your designs. No prior coding experience is necessary to design visual items. Focus on learning basic 3D design principles and Roblox's UGC guidelines.Is it possible to create accessories entirely within Roblox Studio?
Myth vs Reality: While Roblox Studio is crucial for rigging and uploading, you cannot create complex 3D models from scratch there. Reality: Most 3D modeling, like sculpting and detailing, is done in external software like Blender. Studio is for assembly, not initial object creation.How much does it cost to get started as a Roblox accessory creator?
Starting your journey as a Roblox accessory creator can be completely free. Blender is open-source, and Roblox Studio is free to download and use. Your primary investment will be time and effort in learning the software and design principles. Optional costs include advanced texturing software or specific hardware.Modeling & Texturing: Bringing Ideas to Life
What 3D modeling software is best for Roblox accessories in 2026?
Blender remains the top choice for Roblox accessory creation in 2026 due to its versatility, robust features, and active community support. Its continuous updates provide advanced tools for mesh creation and sculpting. Other options like Maya or ZBrush are powerful but often come with a significant cost.How do I apply textures to my 3D model correctly for Roblox?
After UV unwrapping your model in Blender, you'll create texture maps (Albedo, Normal, Roughness, Metallic) in an image editor. In Roblox Studio, import these maps and apply them to your accessory mesh using a PBR (Physically Based Rendering) material. Ensure texture paths are correct for proper rendering.Myth vs Reality: Do high-resolution textures always mean better quality?
Myth vs Reality: Not necessarily! Reality: While high-resolution textures (e.g., 2048x2048) offer detail, overdoing it can cause performance issues and increased load times. Optimizing for sizes like 1024x1024 or 512x512, combined with smart PBR maps, often yields the best balance of quality and performance for Roblox.Rigging & Animation: Making Accessories Move
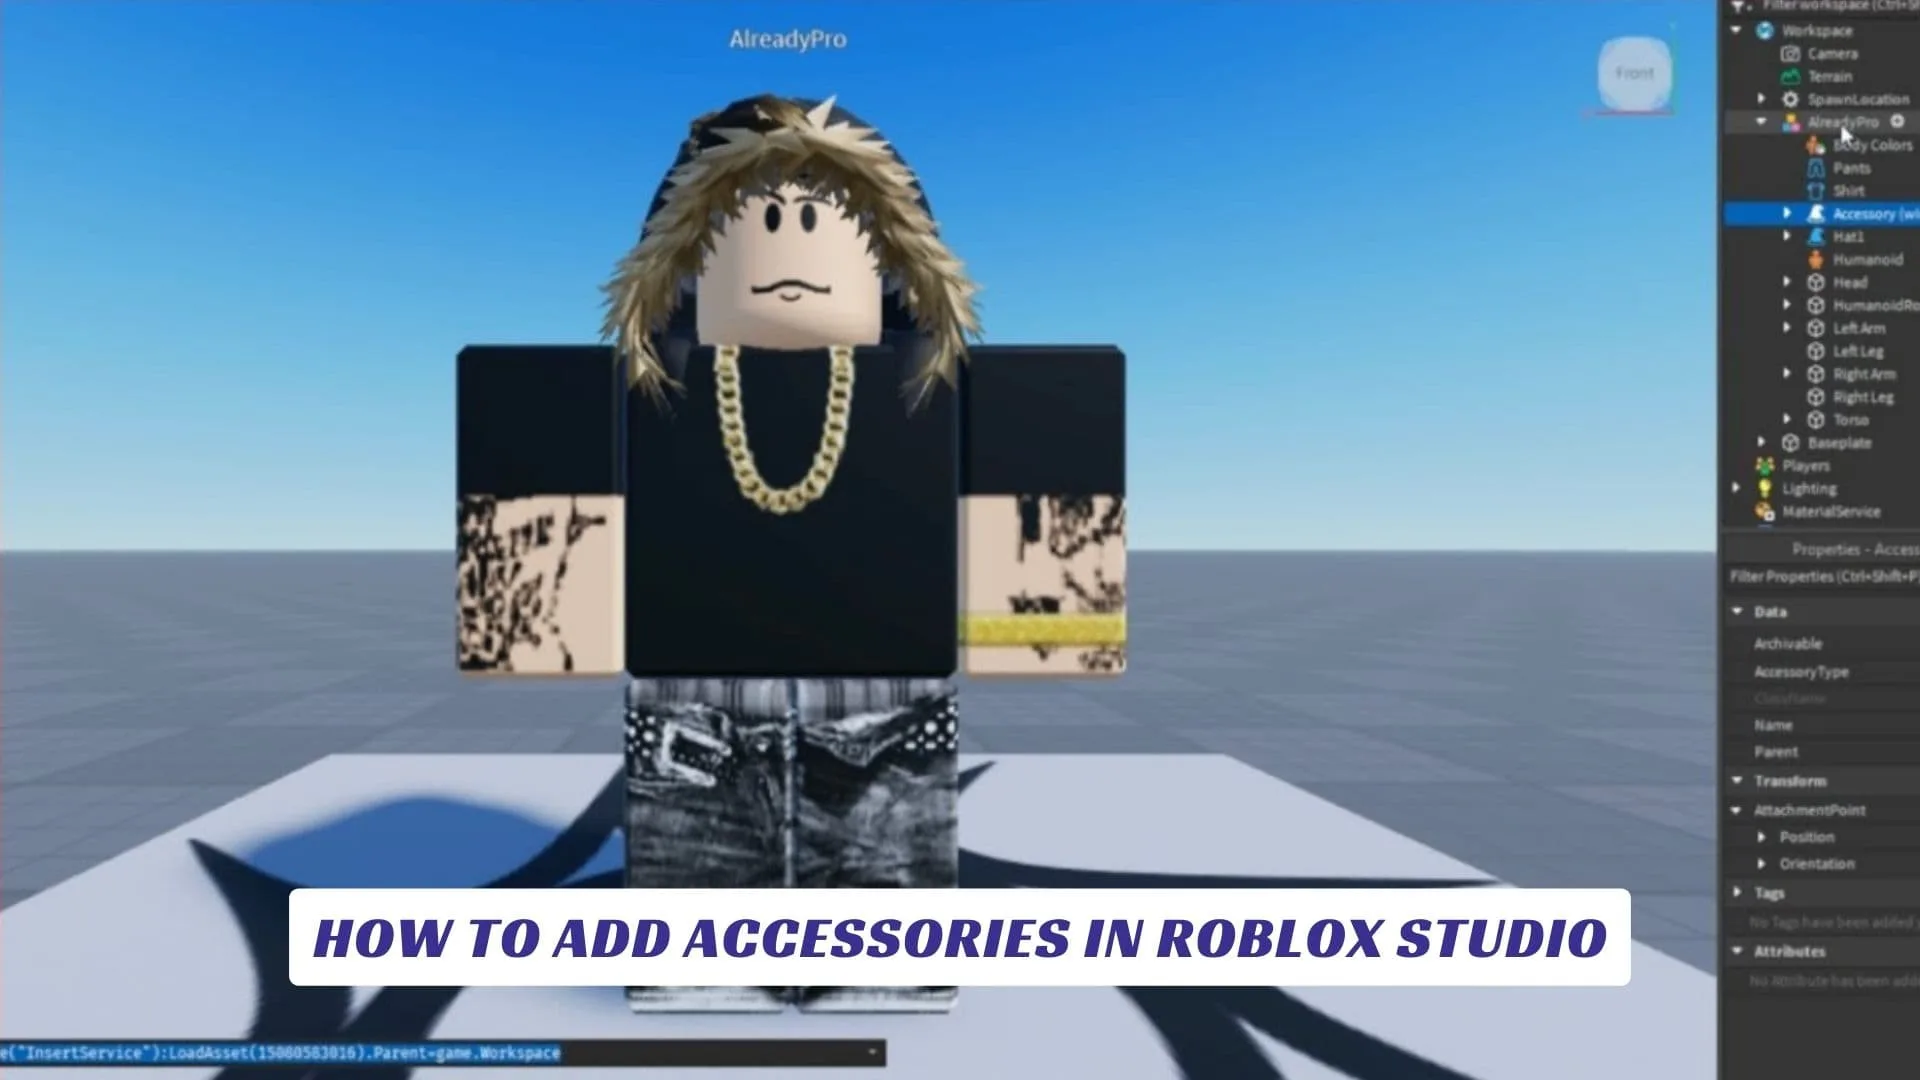
What is rigging and why is it essential for Roblox accessories?
Rigging is the process of attaching your 3D accessory model to the Roblox avatar's skeletal system using joints and bones. It ensures your accessory moves naturally with the avatar's animations. Proper rigging prevents visual glitches like clipping or items floating detached from the character.Can I add custom animations to my Roblox accessories?
Yes, absolutely! For multi-part or articulated accessories, you can use Roblox Studio's Animation Editor to create custom animations. These can be simple movements like a pendant swaying or complex actions for wings, adding dynamic flair to your creations. Scripting can trigger these in-game.What's the difference between R6 and R15 rigging for accessories?
R6 avatars have 6 body parts, while R15 avatars have 15, offering more articulation. Accessories generally need to be rigged to accommodate both, typically by attaching to common anchor points like the head or torso, ensuring compatibility across player preferences. Test both thoroughly.Monetization & Promotion: Getting Your Creations Noticed
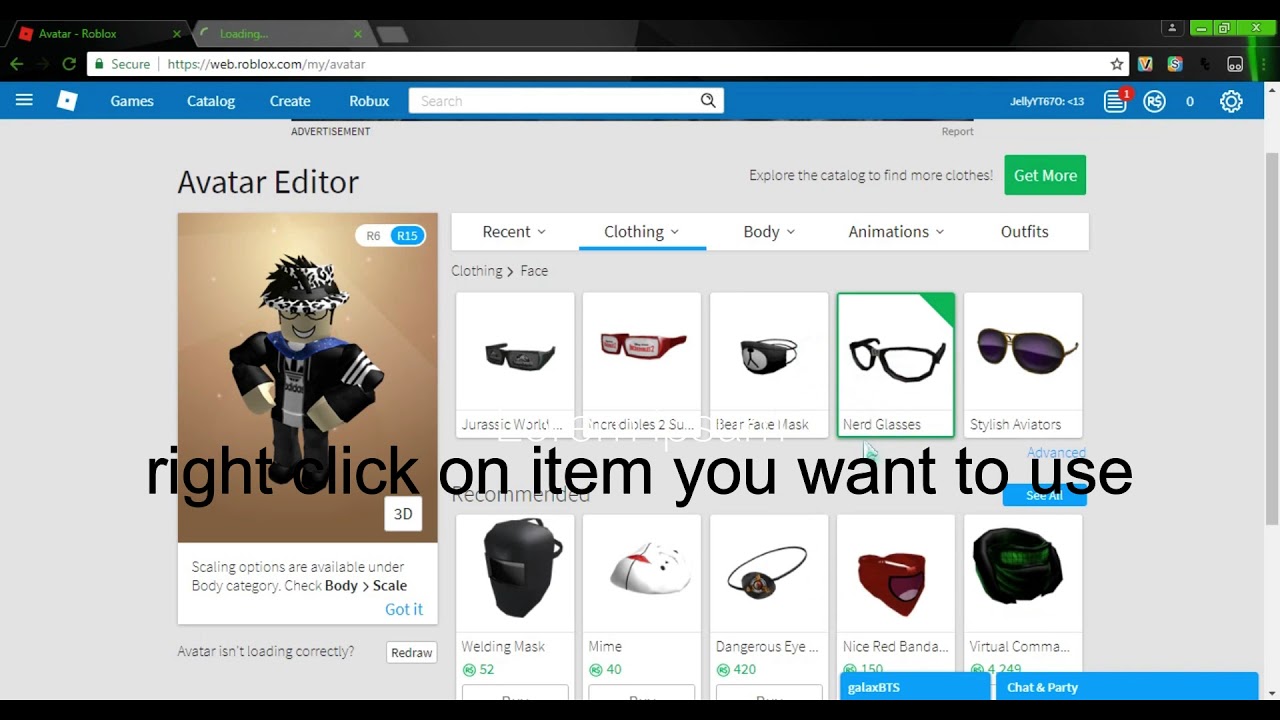
How do I get my accessory published and sold on the Roblox Avatar Shop?
To publish, you must be part of the Roblox UGC Program. After creating and rigging your accessory in Studio, you submit it for moderation review. Once approved, you can set a price, and it becomes available on the Avatar Shop for other players to purchase with Robux.What are effective strategies for promoting my Roblox accessories?
Promote your accessories by showcasing them in popular Roblox games, creating engaging social media content (TikTok, Twitter, YouTube), and collaborating with influencers or other developers. High-quality visuals and interactive previews significantly boost visibility. Engage with your community and gather feedback.Myth vs Reality: Is earning Robux from accessories guaranteed once published?
Myth vs Reality: No, publishing doesn't guarantee sales. Reality: Success depends on design quality, market demand, effective promotion, and competitive pricing. Many factors influence whether players will discover and purchase your accessory. Building a strong brand helps immensely.Advanced Techniques & 2026 Trends
How are AI tools impacting Roblox accessory creation in 2026?
In 2026, AI tools are streamlining initial design phases by assisting with mesh generation and texture creation. They help rapidly prototype concepts and generate variations, speeding up the creative workflow. Full accessory generation by AI is still developing but is an exciting future prospect.What are the crucial optimization tips for high-performance accessories?
Optimize by minimizing polygon counts, using efficient texture atlases, and carefully considering PBR map sizes. Implement LOD (Level of Detail) if scripting allows, reducing mesh complexity at a distance. Avoid excessive transparency layers, as these can impact rendering performance significantly.How can I protect my intellectual property as a Roblox accessory creator?
Secure your original 3D files and textures. Utilize Roblox's DMCA takedown process if you find direct copies. Registering your work if possible and clearly branding your creations can also deter infringement. Documenting your creative process provides strong evidence of ownership.Bugs & Fixes: Troubleshooting Common Issues
Why is my accessory floating or clipping through the avatar?
This usually indicates incorrect rigging or attachment points. Double-check your Motor6D joints in Roblox Studio, ensuring they are correctly parented to the avatar's bones. Adjust the accessory's position and orientation relative to its attachment for a snug fit. Test on various avatar types.My textures look blurry or stretched on my Roblox accessory. What's wrong?
Blurry or stretched textures are typically caused by poor UV unwrapping in your 3D modeling software. Ensure your UV islands are properly laid out, not overlapping, and scaled appropriately to maximize texture resolution. Re-unwrap and re-apply textures for a clean appearance.Myth vs Reality: Will Roblox automatically fix my accessory if it has issues?
Myth vs Reality: No, Roblox does not automatically fix design issues. Reality: Roblox's moderation team only checks for compliance and safety. You are responsible for the aesthetic quality, performance, and proper functionality of your accessory. Test rigorously before submission.Still have questions?
Dive deeper with these popular related guides: How to Master Blender for Roblox UGC, Advanced Roblox Rigging Techniques, and Monetization Strategies for UGC Creators. The community forums are also a fantastic place to find answers and connect with fellow designers!Ever wonder how those incredible hats, wings, and unique items appear on Roblox avatars? We all have. How do everyday creators turn their wildest ideas into digital fashion statements? It's a journey that combines artistic flair with technical know-how. By 2026, the Roblox UGC program has evolved significantly, offering amazing opportunities for aspiring designers. You're about to dive into the world of Roblox accessory creation. This guide covers everything from initial concepts to getting your items noticed by millions. It's truly an exciting time to be a creator.
Beginner / Core Concepts
1. Q: What software do I need to start creating Roblox accessories?A: Okay, so this is a super common question when you're just starting out, and I totally get why it might feel a bit overwhelming. The main tool you'll definitely need is 3D modeling software, with Blender being the absolute reigning champ right now in 2026 for Roblox creators. It's free, incredibly powerful, and has a huge community ready to help you out. Beyond Blender, you'll also be spending a lot of time in Roblox Studio. That's where you'll bring your 3D models into the Roblox environment, handle all the crucial rigging and texturing, and prepare them for submission. You might also want a good image editing program like Photoshop or GIMP for making custom textures, but those are secondary. Don't worry about buying expensive software initially; Blender and Roblox Studio are your best friends. You've got this! Start by exploring Blender tutorials on YouTube.
2. Q: Do I need to know how to code to make Roblox accessories?A: That's a great question, and I'm happy to tell you, nope, not really! For the actual creation of accessories – the modeling, texturing, and rigging – coding isn't a requirement at all. You're focusing on visual design and technical setup within 3D software and Roblox Studio. However, if you ever want to create interactive accessories with special scripts or abilities, then a basic understanding of Lua, Roblox's scripting language, could be super helpful. But for just making a cool hat or a stylish backpack that players wear, you can completely skip the code. Just focus on your artistic vision and the technical steps of 3D design. It's much more about visual art than programming. Keep practicing your design skills!
3. Q: What are the basic steps for making a simple Roblox accessory?A: Right, let's break down the core flow, because once you get this rhythm, everything clicks! First, you'll open up Blender and design your 3D model, shaping it however you like. Think about vertices and polygons here. Next, you'll unwrap your model and create a texture map, which is basically like wrapping paper for your accessory. Then, you'll export that model from Blender as an FBX file. After that, you'll jump into Roblox Studio, import your FBX, and the crucial step of "rigging" begins – this involves attaching your accessory to the avatar's body parts so it moves correctly. Finally, you set up the texture in Studio and save it as a finished asset. It sounds like a lot, but each step is manageable. Try focusing on one stage at a time, you'll get there.
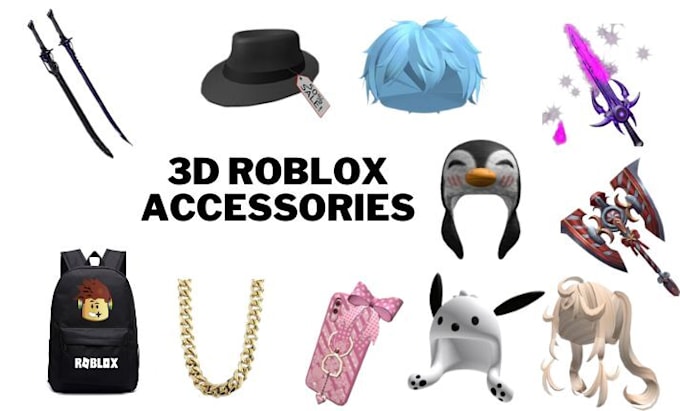
4. Q: What kind of accessories are popular on Roblox right now in 2026?A: Oh, this is where the fun really begins! Knowing what's trending is key to getting noticed. In 2026, we're seeing a massive surge in unique, expressive items that reflect popular culture and niche aesthetics. Think cyberpunk headwear, ethereal fantasy wings with particle effects, and highly detailed, customizable back accessories that can hold virtual pets or glow. There's also a huge demand for accessories that match specific game themes or seasonal events. Players love items that offer both style and a touch of personality. Keep an eye on the official Roblox avatar shop and popular UGC creators; they often set the pace. Experiment with blending current trends with your own unique twist.
Intermediate / Practical & Production
1. Q: How do I make sure my accessory fits all avatar body types correctly?A: Ah, the dreaded fit issue! This one used to trip me up too, but it's crucial for broad appeal. The key is in proper rigging and understanding Roblox's scaling. When you're rigging in Roblox Studio, you're essentially telling the accessory how to connect and move with the avatar's joints. You'll use a Motor6D joint for this, connecting your accessory's primary part to an appropriate Bone in the avatar rig, like the Head or Torso. Also, ensure your accessory's Attachment point is correctly positioned relative to the avatar. Always test your accessory on different R15 and R6 body types, as well as various scaling options, before submission. Use the "Emulate" feature in Studio to cycle through different body shapes. This careful testing avoids those awkward floating or clipping issues.
2. Q: What are the best practices for texturing my Roblox accessory for quality and performance?A: Texturing is where your accessory truly comes to life, and getting it right is a blend of art and optimization. First, always use high-resolution textures but keep the file size reasonable; Roblox suggests sizes like 1024x1024 or 512x512. Use PBR (Physically Based Rendering) textures for that realistic sheen – think Albedo (Color), Normal, Roughness, and Metallic maps. Bake ambient occlusion into your textures for added depth without extra geometry. For performance, try to combine multiple small textures into one larger atlas if your accessory has many tiny parts. This reduces draw calls, making your item load faster in games. It's about finding that sweet spot between stunning visuals and smooth performance. Don't be afraid to experiment with different material properties in Studio.
3. Q: How do I rig a complex accessory like wings or a flowing cape in Roblox Studio?A: Rigging complex items like wings or capes can feel like a puzzle, but it's totally solvable with the right approach. For flowing elements, you'll want to use multiple Bone parts and Motor6D joints, instead of just one. Imagine the wing having a ShoulderBone, an ElbowBone, and a HandBone if it were a limb. You'd parent the individual mesh parts of the wing to these bones in Blender, then connect these bones in Studio. For capes, you might even consider using Roblox's Cloth constraints, which became much more robust in late 2025. This allows for dynamic, physics-driven movement. The trick is to break down the complex item into simpler, articulated sections. Patience is your biggest ally here. Keep adjusting those Motor6D properties!
4. Q: What are the current submission guidelines and review process for UGC items in 2026?A: The UGC submission process in 2026 is streamlined but still very strict, and for good reason – quality control! First, your accessory must adhere to Roblox's community standards and terms of service; no inappropriate content, ever. Your model must be optimized for performance, meaning reasonable poly counts and texture sizes. You need to provide clear thumbnails and a descriptive title and description. All accessories go through a moderation review, which typically takes a few days, but can vary. By 2026, the review process also heavily checks for copyright infringement and proper attribution. Make sure your designs are original. Submitting items that are low quality or violate rules will lead to rejection. Double-check everything before hitting that submit button.
5. Q: Can I create my own animations for my accessories, and how?A: Absolutely, you can! This is where accessories really shine, adding a whole new layer of immersion. If your accessory is rigged with multiple bones, you can use Roblox Studio's built-in Animation Editor to create custom animations. For example, if you have articulated wings, you can animate them flapping. You'd select the Motor6D joints and keyframe their rotation and position over time. Once animated, you can then tie these animations to game events or specific player actions using scripts. You're basically giving your accessory a personality! Remember to save your animations and link them correctly in your game or experience. It’s a powerful way to make your creations feel more alive.
6. Q: What are some common mistakes new creators make when creating accessories?A: Oh, we've all been there with the classic creator blunders! One big one is neglecting proper UV unwrapping in Blender, leading to stretched or blurry textures in Studio. Another common pitfall is having excessively high polygon counts, which really hurts performance and can lead to rejections. Improper rigging is another frequent culprit – accessories not attaching correctly or moving bizarrely with the avatar. Also, ignoring Roblox's naming conventions for parts and attachments can cause issues during submission. Finally, not testing your accessory on diverse avatar bodies and scales is a huge oversight. Learn from these common missteps. Always optimize, test thoroughly, and adhere to guidelines. You'll save yourself a lot of headaches this way!
Advanced / Research & Frontier 2026
1. Q: How are AI and procedural generation influencing Roblox accessory design in 2026?A: This is cutting-edge stuff, and I get why this excites so many people! In 2026, AI is beginning to revolutionize the prototyping phase. We're seeing AI tools assisting with initial mesh generation based on text prompts or sketches, drastically speeding up concept iteration. Procedural generation is used to create unique texture variations or subtle details on accessories, like complex organic patterns or intricate engravings, without manual drawing. Some creators even use AI to generate entire sets of themed accessories with consistent aesthetics, saving countless hours. While direct "AI creates finished accessory" isn't fully mainstream due to quality control, AI-powered assistance for modeling, texturing, and even rigging suggestions is definitely growing. It's an exciting frontier to explore!
2. Q: What are the latest optimization techniques for ultra-high detail accessories in 2026?A: When you're pushing boundaries with ultra-high detail, optimization becomes an art form itself! In 2026, beyond standard poly reduction and texture atlasing, we're seeing advanced techniques like dynamic LOD (Level of Detail) systems becoming more accessible within custom scripts, where accessory detail changes based on player distance. Another frontier is aggressive texture streaming, prioritizing visible details. Using baked lighting and ambient occlusion directly into PBR textures rather than relying solely on real-time calculations is also key. Smart use of alpha masks for intricate patterns instead of complex geometry also saves a ton of performance. It's about rendering cleverness. You're effectively "cheating" realism without the performance cost.
3. Q: How can I leverage new Roblox features like custom physically-based materials for my accessories?A: This is a game-changer, truly! Roblox's expanded physically-based materials, which matured significantly by late 2025, allow for unparalleled realism. To leverage them, you need to understand the material properties: ColorMap (albedo), NormalMap for surface bumps, RoughnessMap for shininess, MetallicMap for metallic appearance, and EmissiveMap for glowing effects. You’ll create these maps in your 3D software or an image editor. In Studio, apply a PBR Material to your accessory mesh, then assign each map to its respective slot. This gives you complete control over how light interacts with your item, making it look incredibly realistic. Experimentation with these maps is essential to achieve that high-fidelity look. Don't underestimate the power of a good NormalMap!
4. Q: What's the best way to secure my custom accessory against intellectual property theft?A: This is a very real and important concern for any creator, and I completely get it. While no digital content is 100% theft-proof, you can definitely take steps. First, ensure your original 3D files and textures are securely backed up offline. On Roblox, submitting your item through the official UGC program automatically grants Roblox certain rights for platform distribution, but you retain the underlying IP. Watermarking your promotional images is a simple deterrent. If you discover direct copies, Roblox has a robust DMCA (Digital Millennium Copyright Act) takedown process. Document everything: creation dates, unique asset IDs, and any communications. Prevention is key, but know your rights and processes for reporting infringement. It's about protecting your hard work.
5. Q: What are the emerging monetization strategies for Roblox accessory creators in 2026?A: Monetization is always evolving, and in 2026, it's more dynamic than ever! Beyond direct sales of your accessories in the Avatar Shop, a major strategy is creating exclusive accessories for specific experiences or events. This drives engagement to games and provides unique incentives. Partnering with popular Roblox developers to create branded or themed items for their games can also be incredibly lucrative, often involving revenue share agreements. Limited edition drops, much like real-world streetwear, generate huge hype and demand. Some advanced creators are even exploring subscription-based access to exclusive accessory lines within their own creator hubs. Think about building a brand around your creations. It’s not just about selling; it’s about community and exclusivity.
Quick 2026 Human-Friendly Cheat-Sheet for This Topic
- Start simple with Blender and Roblox Studio; they're your core tools, and they're free!
- Always aim for optimized models: low poly count, reasonable texture sizes for smooth performance.
- Test your accessories on all avatar types and scales before even thinking about submission.
- Learn the art of PBR texturing; it's the secret sauce for truly realistic items in 2026.
- Don't be afraid to animate your accessories; it brings them to life and adds huge value.
- Stay updated on Roblox's UGC guidelines; they evolve, and staying compliant is key to success.
- Network with other creators! Sharing knowledge and collaborating can open up amazing opportunities.
Conceptualize designs. Utilize 3D modeling software like Blender. Master Roblox Studio for rigging and texturing. Understand Roblox's UGC program guidelines. Submit accessories for review and approval. Promote your creations effectively. Stay updated on 2026 Roblox trends.
35


How To Add Accessories In Roblox Studio Complete Guide 2024 YouTube . How To Add Accessories In Roblox Studio Lawod How To Add Accessories In Roblox Studio.webp. How To Make Custom Accessories In Roblox Studio At Christopher . How To Make Accessories In Roblox Playbite How To Make Accessories In Roblox . How To Make 2D ACCESSORIES IN ROBLOX YouTube


How To Wear Multiple Face Accessories Roblox 2024 YouTube . How To Do ACCESSORY ADJUSTMENT On Roblox 2025 Tutorial YouTube . How To Wear Multiple Accessories On Roblox Mobile 2025 YouTube . Good Roblox Accessories At Terry Rousseau Blog . Max Out Your Roblox Look Equip ALL The Accessories


How To Add Accessories In Roblox Studio Add UGC Items To Roblox . How To Equip Multiple Accessories In Roblox Roblox Accessories Guide . How To Add Accessories And Gears To Rigs Roblox Studio Tutorial YouTube . How To Make Custom Accessories In Roblox Studio YouTube . How To Make Roblox Accessories In Blender UGC YouTube


How To Make Custom Accessories In Roblox Studio At Christopher . How To Make Roblox Accessories Get Robux YouTube . How To MAKE HATS HAIR ACCESSORIES WITHOUT ROBLOX STUDIO On ROBLOX 1675222397 . Create 3d Roblox Accessories And Ugc Roblox By Lenexa Lane Fiverr Create 3d Roblox Accessories And Ugc Roblox . How To Put On Multiple Accessories On Roblox Equip Roblox Multiple


How To Make Accessories In Roblox In 2025 YouTube . Make Your 3d Ugc Roblox Accessories Helmet Bag Hat Weapon Hair By Create Your 3d Roblox Accessories Cloth Bag Hat Chain Hair And Many More . Create Roblox Accessories Modeling 3d Roblox Items Design By Okwena Create Roblox Accessories Modeling 3d Roblox Items Design . How To Create And Sell Your Own Roblox Accessories New Guide YouTube . How To Adjust Accessories In Roblox 2024 Quick Tutorial YouTube


How To UPLOAD ACCESSORIES In Roblox FULL GUIDE 2026 YouTube . Tutorials Customuse Blog Upload To Roblox . How To Get Fire Opal In Prospecting Roblox March 2026 Guide All Roblox Kaizen Accessories Guide . How YOU Can Make YOUR OWN ROBLOX ACCESSORIES Public UGC YouTube . How To Add People Roblox Easily Your 2026 Guide


How To Add Accessories To NPCs In Roblox Studio Any Catalog Item Added . How To Make Roblox Accessories In 2025 Get Robux YouTube . How To Make Your Own ITEMS In Roblox Without Blender Create Hqdefault . How To Make Custom Accessories In Roblox Studio At Christopher . Making Roblox UGC Accessories How To Make ROBUX YouTube